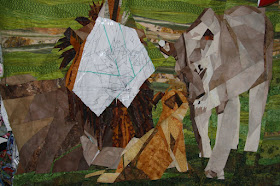
 The lions are progressing. They still are only in sections but I only have six sections left -- important ones but smaller ones than those I have done. I have been doing a lot of piecing to make "fabric" for the manes.
Well, I thought I would do a little summary of my process for doing the lions. It is based of course on the technique that Ruth McDowell details in many of her books. I do things a bit differently though as probably anybody does when they have worked with someone else's process.
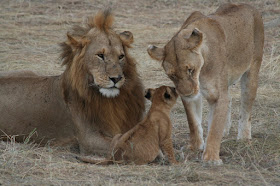 I first find a photo I really like and this is really important. I try to find a photo that has a good range of values in it. I then use Photoshop (or any photo program) to change the photo to black and white (desaturate the color). I then "posterize" it so that there are larger areas of one shading. I again check the picture to make sure there is enough differentiation of the areas and that it hasn't gone to far to "cartoon" like. Next I take the black and white image to Staples and have them blow it up to double size. I use this as my base. I use transparent plastic to trace around the different clumps of shading, getting as much detail differentiation as I can. I then put a piece of tracing paper over this and start deconstructing the drawing by trying to find large linear components. After I have sub-divided the drawing using these large linear elements, I just keep subdividing until you can begin to see the original image in this large straight line piece. I have used curves in one piece as well but do prefer the more abstract representations created with the straight lines.
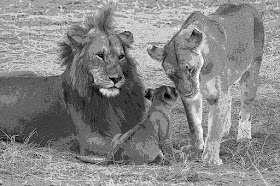
This is the posterized version of the converted picture.
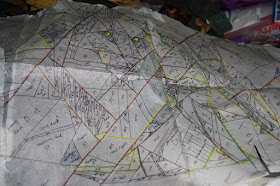 After I have gotten the tracing to where I am comfortable, I then take a picture of the tracing paper drawing. I determine how large I want to make the final piece at this point and use an online poster program to blow up the tracing paper image into the size I want. The lions took 49 pieces of paper (4 1/2 feet by 6 feet). If the final piece will be less that 3 feet by 4 feet, I will have Staples again blow up the image on their large copier and will make two copies (instead of using the poster program).
I then use use a colored marker over the solid black lines to differentiate the sections. Now it is important to make sure all the lines on this original drawing are dark enough. Then I place a piece (usually have to tape a number of sections of freezer paper together) of freezer paper over the whole drawing with the shiny side facing up. I carefully tape it to the blownup drawing and then tracing using a thin black permanent marker all the lines onto the freezer paper. This will be my pattern. I then turn the freezer paper over and make all the tick marks so that I can put the pieces back together (see Ruth's books for her techniques here which I use religiously).
I now mark piece numbers on my tracing paper pattern using a section letter and a piece number. I then transfer these to the freezer paper pattern (not on the shiny side). After the freezer paper pattern is fully marked up, I then cut it into sections and place each section in plastic bags. If I have a second Staples copy of the whole pattern, I then cut it into sections and place the appropriate section in the plastic bag with the freezer paper section. If I have used the poster program I take the individuals sections and then photocopy the shiny side. This gives me a piece I can work on at the sewing machine (I have very tiny parts in my pieces). I pin up the master pattern on the wall and as I finish a section at the sewing machine, I will pin it to the appropriate area on the master pattern.
At this time I also make sure I have printed out a color copy of the original picture as well as a transparency of the original tracing paper pattern (both 8 1/2 x 11). I tape the transparency over the original picture and this helps with the individual color selections.
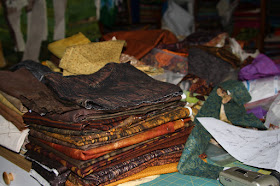
Working each section, I first put together a pallette of colors I think will work for this area (out of the huge selection I have chosen for the whole piece ahead of time). I will mark these color choices on the copies of the section sitting by my sewing machine. I will then cut the freezer paper pieces apart as I group all the pieces together that I want out of one of the color selections. I will pin them onto the fabric and then rough cut around giving at least 1/2 in around the piece. After I complete doing this for a section, I go to the ironing board and iron all the freezer paper pieces onto the appropriate fabrics. I then take the pieces back to my work area by the sewing machine and use a rotary cutter and ruler to make 1/4 inch seams all the way around. I then place them back into my plastic bags. I try to do the color matching during the day as I have found I make better choices.
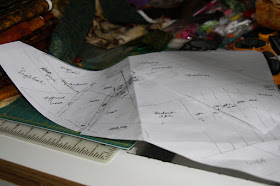 After I finish 3 or 4 sections, I use my pattern copy as a guide and start sewing the pieces together. It is a lot like doing jig saw puzzles but with careful marking and 1/4 in seams, they go together effortlessly no matter how small! There is a real danger to doing each section at a time and I do have to undo pieces when I put them up on the wall occasionally and at the end I will sometimes applique over a troubling area that is too hard to undo.
I leave the freezer paper patterns in until the very end as many times I will use the pattern piece again to replace a color that didn't work. Also it helps to stabilize the piece which by this time has every bias imaginable (I am not terribly careful except on the large pieces to mark the grain lines -- I am thinking in the future that I would like somehow to have a grid on the paper that I use or the freezer paper ideally).
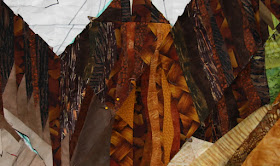
This is a closeup of the mane on the male lion.
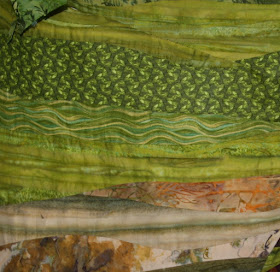
Another technique that I use is to make my own "backgrounds". I haven't done this on all my pieces but have found that when I have large areas to fill, I prefer to make my own fabric to fill these areas. I decide on the general color and range of values that I want to use and then I randomly put the pieces together using curved piecing methods to create in some cases fairly substantial yardage. I then use this like any other striped fabric. I have used this extensively in both the background for the lions and in the mane of the male lion as I wanted a more organic look. It does complicate the piecing process a bit as I like the stripes to generally match across a large area (which is generally made up of many small templates).
Truly amazing, Beth, your lions look so much like that photo. Think this proves how great blogs can be tho since we are able to follow your progress with each step you take!
ReplyDeleteYou must have the patience of a saint! No wonder your work looks so fabulous with all the detail you do at each step. Thanks for sharing with us Beth. I love watching your pieces take shape before my eyes!
ReplyDelete