skip to main |
skip to sidebar
I decided that I really liked the looks of these as a runner. You can see them better individually since each is so different. I surrounded them each with some random hand dyes.
I then surrounded each one with blue hand dyes. I had to do it this way as I didn't have a piece long enough to go down the side. Also, if you look real closely, you can see that the bottom mandala is a little larger than the other two! By the time I noticed that, I was too lazy to take it apart and cut it down to size!
I didn't want to start anything new as guests are arriving today for a week of bridge and conversation. One is a quilter I understand although I haven't met her yet! This is a quick use of my 2 inch strips and more of the black and white fabric that never seems to run out. Amazingly, I thought I had brought it all down here to NC but discovered another box when home this summer!!
So I won't be posting for at least a week!
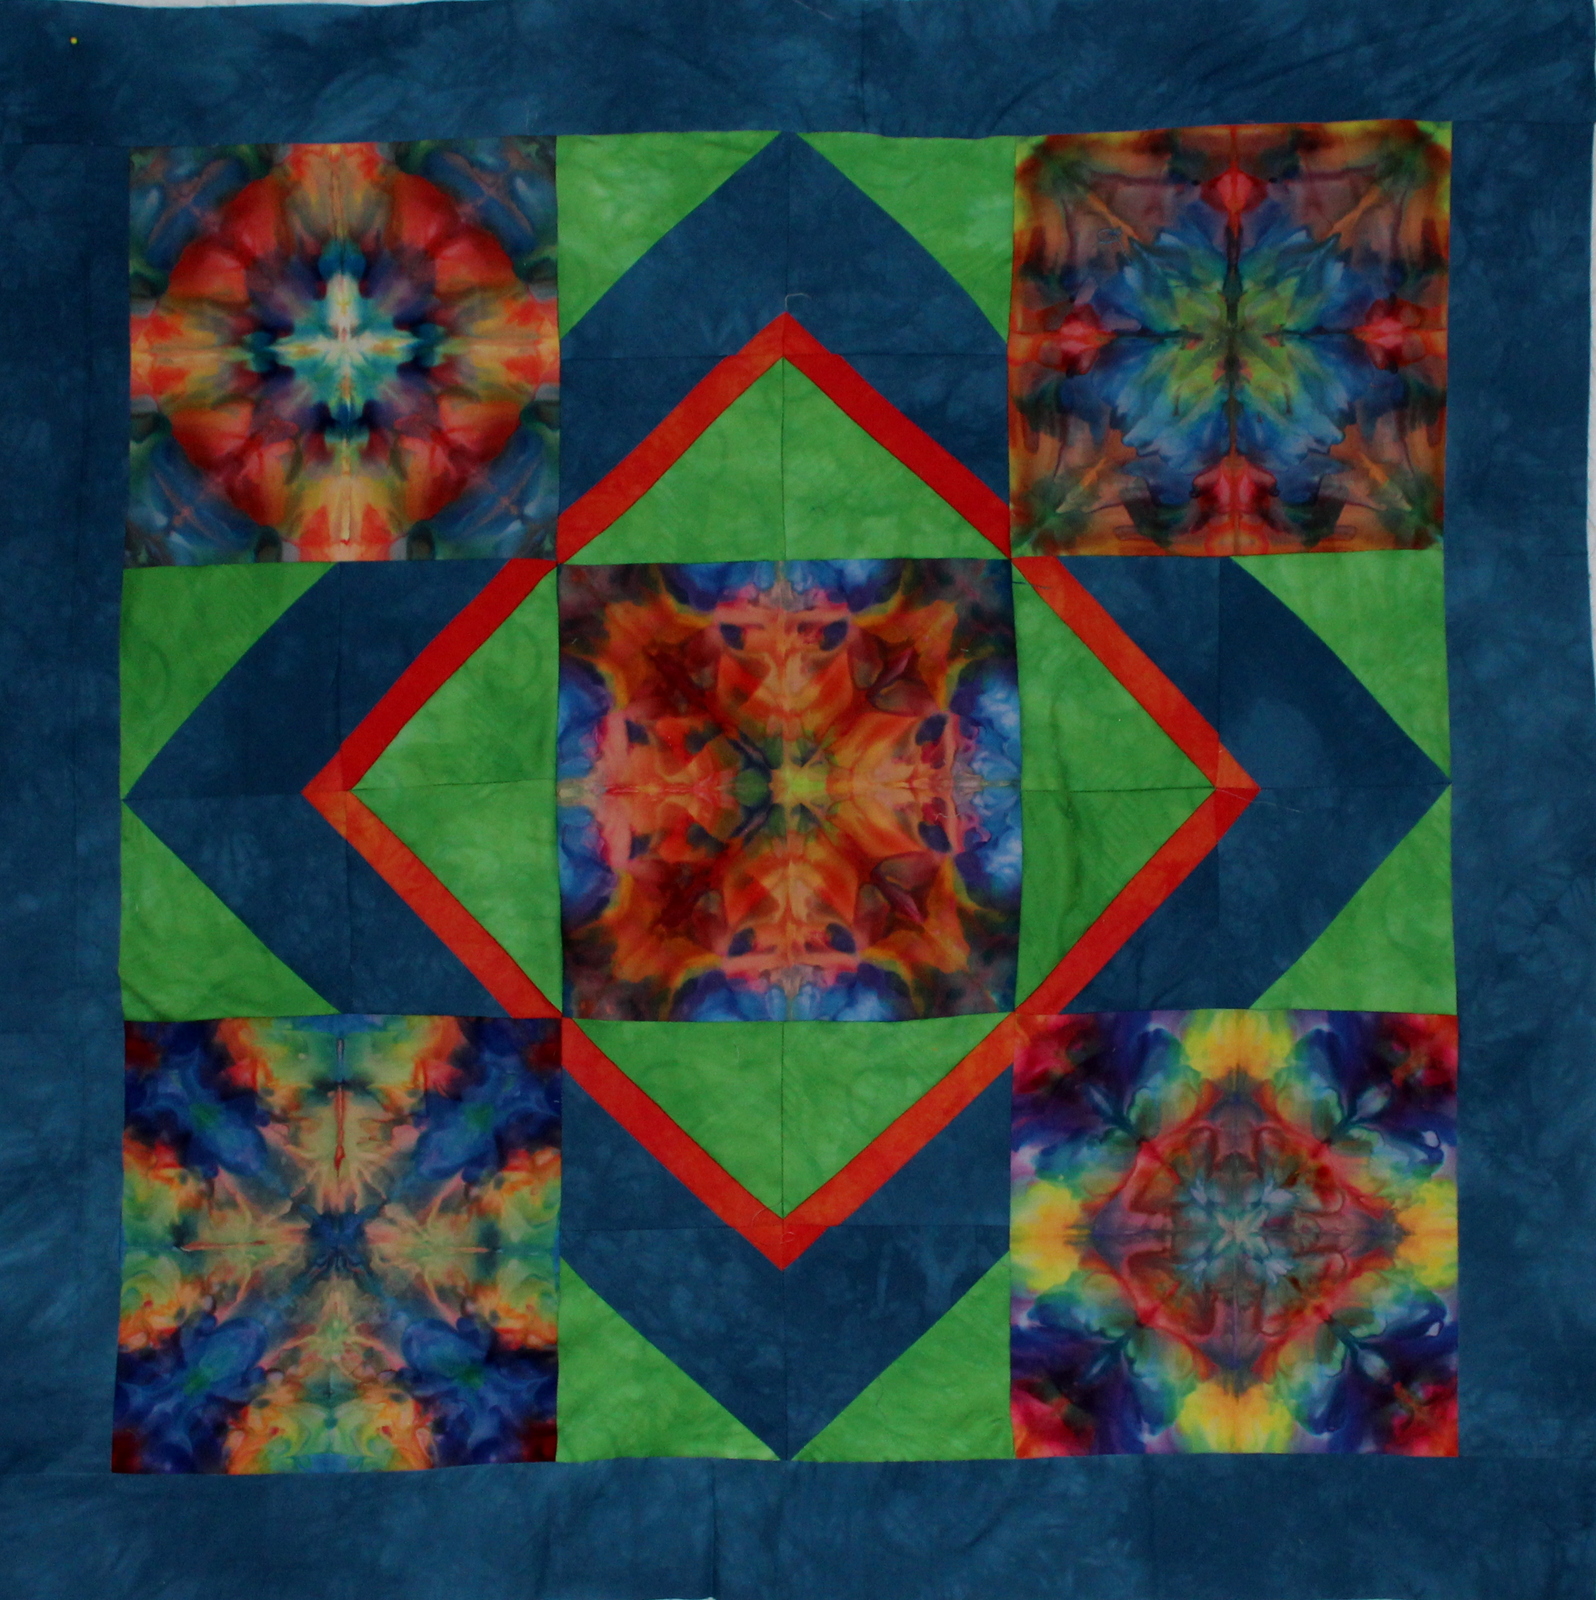
I decided it was time to get down to business and finish at least one version of a mandala quilt. I decided to fill in the spaces between the blocks with blocks made using a string method for making half square triangle squares. I sewed a long piece of blue to the orange and the orange to the green and then the green to the blue and then used a 90 degree angle ruler to cut them. This is a very efficient way to make half square triangles except they are all on the bias. Also I made them a bit too big and so had to trim them down which was not easy. I won't use that method again for something like this unless I am more sure of the sizes. I should have blocked it out in EQ8 but was anxious to get started.
All sewn together with all the squares made. I decided that it would look better if I had surrounded each of the mandalas with a thin strip of the orange. It is okay but I find the orange to be a bit overwhelming.
You may notice that I rearranged the blocks as well, putting the brightest in the middle -- why I always take pictures before sewing together. All the fabrics are my hand dyes.
I initially thought I would do a really thin strip of orange first in the border and left it overnight.
I changed my mind this morning and decided there was enough of the orange and the green was also a bit too much for me so hopefully calmed everything down with a wide border of the blue. Now to figure out how to quilt it. It measures 41 x 41. I also have to decide what to use as binding. There isn't enough of the blue left unless I can find another piece somewhere!
It's been a week of mindless quilting and I have dealt with those 30s repro fabrics for the last time. The rest go to the free table!
This was the first of three I finished today. I started this one yesterday as it is a 4 patch pattern that I have always liked. I had to draw it out though to make the correct number of blocks. There are truly scraps from a baby quilt I made for my daughter's godchild. I do like to do four patches and exploring the various way to use them.
I just wanted to use up some of the scraps but decided I should add white to the mix. It is okay but certainly not a favorite!
Another use of the four patches. I used some of my hand dyed fabric for the squares as I didn't have any large plainly colored scraps and I didn't want to do all white. This muted yellow I thought worked well (although this picture does not do it justice for some reason). Another use of four patches is here. By the time I finished this one, I never wanted to see these fabrics again.
This is one I finished a few days ago and forgot to post!
And here is the bag that is left over and which will be donated to the free table! There is still quite a bit in here but I can't stand looking at these fabrics anymore!! I didn't care for them to begin with as muted colors are not my thing. I had thought I had sold all my 30s repros years ago but alas still had a bunch of fat quarters.
I have challenged myself to do something with these dyed pieces. I was going to incorporate all of these but decided not to use them all in one quilt.
I have an idea of how to use these five and will probably make the other three into a three panel vertical hanging. I really think these are about as good as any I have done and do want to show them off if I can!
I had a ton of these half rectangles cut up already so spent the last couple of days making random 4 patches so I could finish some tops. I am really liking the versatility of the simple four patch these days and have a Pinterest album now dedicated to them. I have made this pattern several times already. This is the first of four that I completed today! They are all different!
This is a collage of all four so you can see the differences more easily. The bottom left corner is the result of cutting the rectangles into triangles without putting them all right side up!! You can cut squares willy-nilly into triangles but not rectangles. I learned this the hard way!
I had enough four patches left so I could do three more of the above quilts but as I am easily bored, decided to move on to something else and I had the right number of four patches left to do this. Just have to add something between them and pretty sure I know what I will be doing!
Decided it was time to actually dive into some of those bags of strips I brought down with me. This bunch was many depression era prints that I thought would make good baby quilts. They were all fat quarters that I cut up so just the right width so I would have lots of variety.
It is a super easy pattern. I sew 6 2 1/2 strips together and then add a light colored strip. I made a bunch of these and then cut them into 4 1/2 in wide strips. I then sew 2 2 1/2 x 4 1/2 inch strips end to end and add a light color strip at the end. Now you just have to sew the 2 long strips together and add one of the 3 patches to each side. You put them together by just putting one vertical with a horizontal one next to it.
I made 2 40 in x 40 in tops in two days (about 4 hours total) but I did have the 2 1/2 in strips already cut. I made a small dent in these!
The second one.
I went back to a bag of these pre-cut pieces and made 16 blocks very quickly! I really like this particular block as it is easy and there are little spots of bright colors.
Today I made about 75 4 patches as I still have a lot of the half rectangles already cut so I can make a few of these. I think I will just challenge myself to made one a week for the whole year. Of course with surgery this summer, my machine quilting may be severely limited as I can't be on my feet for a couple of months. I do need to make a dent in those strips though!. Our local neo-natal unit has about 750 babies through it a year. Our Guild managed to donate over 350 this year but still not enough
Of course, I still have the makings for more Habitat or Humanity house quilts. They needed 15 of those for this year also. I think I have donated 3 for that.
This was the beginning of putting all those hexagons on the wall around the goose to see what I had. I was overwhelmed at this point by the sheer number. I knew the brown was kind of overwhelming everything. I also knew that I didn't want those words (Realtime) showing on the final piece. Each of these hexies is two halves with a thread in the middle holding them together.
I made the mistake of first putting the goose on one of my design walls and then had to remove all the hexagons and replace the panel across the two design walls so I would have enough room to work. I have no idea how you would make one of these without a large design wall.
I think I have placed about all the hexies in this picture. Still hadn't measured the height or width and determined how many hexies I REALLY needed!
Here I have sewn the hexagons on the left side together.
I have sewed all the rows together and placed them over the panel matching the middle hexagons with the ones on the sides -- the tricky part when you haven't measured anything to begin with!
Here are the four sections before they are attached to the panel and now comes the tricky part!!
I hand appliqued down the hexagons on the top and the ones on the bottom as I wanted to preserve as many hexagons intact as possible as I was going to trim off the tops and bottoms. I had to trim down the panel and really work at sizing it so I wouldn't lose any of the mallards or the Canada goose when trimming. You have to match those partial blocks on the bottom as you can see here. I must have done a good job of measuring and placing as it came together with no problem although I had to trim about 6 inches of the width and did a pleat on the bottom to cover up the words which I didn't want. It isn't noticeable at all.
The top is done!! It measures about 62 inches wide and 72 inches long. Eventually I will get quilting on this but that will wait a bit as I like to think through that especially with a piece like this one.
These are the hexagons that I had left.
I will make another quilt with these for the charity group.
I decided I wouldn't do this arrangement!
These are made from the 1 1/2 squares that I cut from the ends of the hexagon strips. They will probably end up as potholders or a tote bag. I have 27 altogether.
Lessons learned:
1. Determine at the beginning the exact size of the panel that you are planning on using. Use this as a rough measure of how wide you should cut your strips so that your hexagons will fit across and down the panel without having to trim large amounts of the panel.
2. Don't keep the hexies together with a thread like I did. I had read this was a clever way to keep them together. It makes them very difficult to handle in large quantities. Use a pin in the middle to hold the two sides together as they don't wiggle then..
3. Don't get overwhelmed and keep your camera very very handy as this gives you a better idea of where you are. It points out where the out of place hexies are. Once I started doing that a lot, it started coming together.
4. Pile the hexies in small piles by color so you can quickly exchange pieces easily.
5. Attach the panels to the top and bottom first and then add the sides. For some reason, this was not obvious to me but I read it on someone else's blog.
This may seem very obvious but when you are overwhelmed, you don't think quite a clearly as you should!