skip to main |
skip to sidebar
I decided that I really liked the looks of these as a runner. You can see them better individually since each is so different. I surrounded them each with some random hand dyes.
I then surrounded each one with blue hand dyes. I had to do it this way as I didn't have a piece long enough to go down the side. Also, if you look real closely, you can see that the bottom mandala is a little larger than the other two! By the time I noticed that, I was too lazy to take it apart and cut it down to size!
I didn't want to start anything new as guests are arriving today for a week of bridge and conversation. One is a quilter I understand although I haven't met her yet! This is a quick use of my 2 inch strips and more of the black and white fabric that never seems to run out. Amazingly, I thought I had brought it all down here to NC but discovered another box when home this summer!!
So I won't be posting for at least a week!
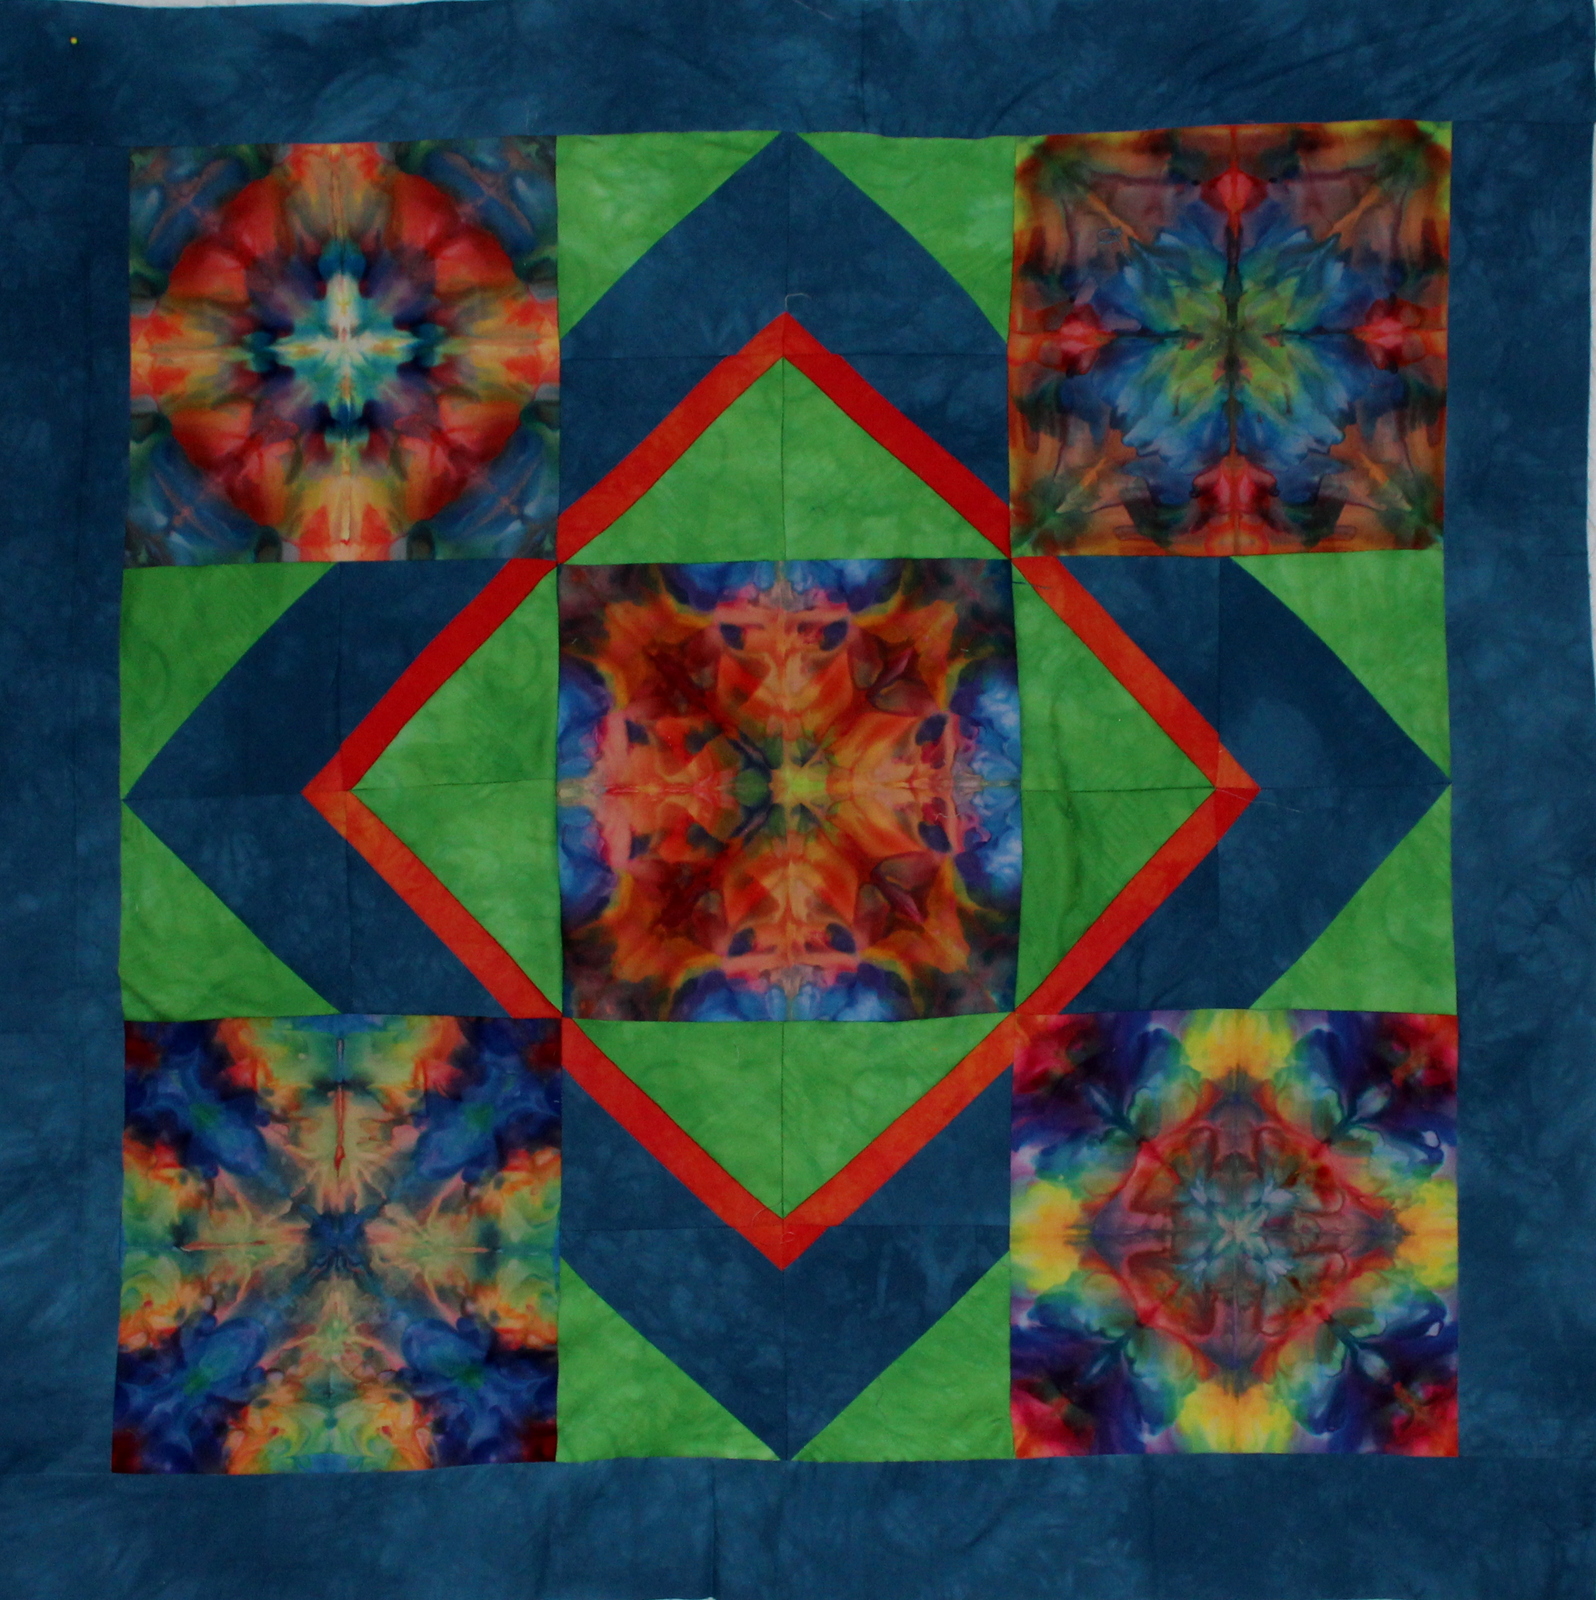
I decided it was time to get down to business and finish at least one version of a mandala quilt. I decided to fill in the spaces between the blocks with blocks made using a string method for making half square triangle squares. I sewed a long piece of blue to the orange and the orange to the green and then the green to the blue and then used a 90 degree angle ruler to cut them. This is a very efficient way to make half square triangles except they are all on the bias. Also I made them a bit too big and so had to trim them down which was not easy. I won't use that method again for something like this unless I am more sure of the sizes. I should have blocked it out in EQ8 but was anxious to get started.
All sewn together with all the squares made. I decided that it would look better if I had surrounded each of the mandalas with a thin strip of the orange. It is okay but I find the orange to be a bit overwhelming.
You may notice that I rearranged the blocks as well, putting the brightest in the middle -- why I always take pictures before sewing together. All the fabrics are my hand dyes.
I initially thought I would do a really thin strip of orange first in the border and left it overnight.
I changed my mind this morning and decided there was enough of the orange and the green was also a bit too much for me so hopefully calmed everything down with a wide border of the blue. Now to figure out how to quilt it. It measures 41 x 41. I also have to decide what to use as binding. There isn't enough of the blue left unless I can find another piece somewhere!
It's been a week of mindless quilting and I have dealt with those 30s repro fabrics for the last time. The rest go to the free table!
This was the first of three I finished today. I started this one yesterday as it is a 4 patch pattern that I have always liked. I had to draw it out though to make the correct number of blocks. There are truly scraps from a baby quilt I made for my daughter's godchild. I do like to do four patches and exploring the various way to use them.
I just wanted to use up some of the scraps but decided I should add white to the mix. It is okay but certainly not a favorite!
Another use of the four patches. I used some of my hand dyed fabric for the squares as I didn't have any large plainly colored scraps and I didn't want to do all white. This muted yellow I thought worked well (although this picture does not do it justice for some reason). Another use of four patches is here. By the time I finished this one, I never wanted to see these fabrics again.
This is one I finished a few days ago and forgot to post!
And here is the bag that is left over and which will be donated to the free table! There is still quite a bit in here but I can't stand looking at these fabrics anymore!! I didn't care for them to begin with as muted colors are not my thing. I had thought I had sold all my 30s repros years ago but alas still had a bunch of fat quarters.
I have challenged myself to do something with these dyed pieces. I was going to incorporate all of these but decided not to use them all in one quilt.
I have an idea of how to use these five and will probably make the other three into a three panel vertical hanging. I really think these are about as good as any I have done and do want to show them off if I can!
Finally figured out how to insert my mandalas into Electric Quilt -- whew.. I have wanted to try out some layouts before I cut into the hand dyed fabrics which I will use with the mandalas as I have a finite amount of the colors here in NY. So this isn't a real quilt yet and I want to simplify a bit more so it can potentially be made into a pattern.
This is a second variation leaving out that middle block. I like it better but think I want to cut down on the strips.
This is a block I saw online somewhere -- not sure where. It was in a quilt and was a little bit of a challenge to figure out and then diagram in EQ. It is really very simple but when you rotate every other block, it takes a bit to figure it out!
Here are the first blocks I did and you can begin to see that it is a little confusing.
I haven't added the 2 inch border yet but this is 9 blocks which makes a 36 x 36 quilt which will be 40 x 40 when I add the border. Each of the individual pieces is 2 1/2 inch x 4 1/2. I used 21 wide strips and sewed strip sets of 5 deeply colored pieces with a additional light colored one on the end. Then you cut 4 1/2 inch wide strips. The tricky part is to make sure that the light strip is always in the same corner (you don't have to ask how I know!!). It is super quick and easy and ideas were just swirling around as I stared at this including reversing the colors completely, using yellows and pinks where the dark colors are now and then using shades of purple and blue/purple in the white areas. I had a couple of more thoughts which I played with in EQ. These are below.
In this version, I surrounded the light strips with yellow.
In this one, I replaced the light strips with a darker color.
Two weeks ago we did some dyeing at Dianne's house. I finally used up the remainder of my 100 yard bolt. I just did some gradations as I wanted primarily lots of greens as I use a lot of green. I also use a lot of purple and was trying for some darker purple. This was a gradation of Intense Blue that I added 2gms of grape dye to each baggie. There was a yard in each bag and I started out with 10 grams/intense blue dye in the darkest of these.
This was a gradation of navy with 2 gms of Sun Yellow added to each baggie.
This was a gradation of Dark Green with the Sun Yellow. Looks to me like ProChem's Dark Green is a mixture of Sun Yellow and Navy!! I may not have even separated these properly but will have lots and lots of greens. They are actually a little more limey than these pictures show.
After finishing up the baby quilt for my daughter to give to her friend, I had to return to my other required sewing which was slip covers for our dining room chairs so that they can come out of the bedroom and be kitty-proof!! This was my test with real fabric but not the final fabric. They will be passable but that is all they need to be!!
I am still playing with this spinning piece and found the accompanying pieces which I had forgotten I had. They are a bit dull but I think putting borders on the little pieces will perk things up a bit. I just have to decide what to put between the pieces. I think any pieced block would greatly detract from the mandalas (and that might be a good idea in this case!!) but may go with white or a light color of some kind in this negative space. It is evolving but first have to finish those pesky slipcovers!! The good news is that I have plenty of the black pseudo suede in my stash down here and will even have a couple of yards left!
I decided to try to finish up my piece from the Round Robin competition at the quilt show. This was the piece as it stood at the end of the show. It is maybe 20 x 27 inches.
I whacked it apart some more to break up the green a bit as I found it to be a bit overwhelming. I then did a "pillowcase" backing and did some quilting in the ditch to stabilize it and help me decide what to do next.
I found I really liked the piece!
I decided finally to just do parallel line quilting across the whole quilt about 3/8 in apart. I didn't do this over the appliqued leaves. I outlined those leaves and free hand quilted some veins so that it would show up a bit more. I had done this kind of quilting on another abstract piece I did a few years ago and found it kind of pulled everything together. Just have to put a sleeve on now!
It was so nice to machine quilt on a smaller piece after spending 2 to 3 weeks quilting the monster below!
I didn't have a wall big enough to show this whole quilt and this picture was taken with my phone so not too great. I finally finished the quilting and it is good enough to put on a bed but won't see a quilt show in its future!! If I had it to do over, I would leave out the blocks that are set up on their corners. They weren't great blocks to begin with and they pull your eye into a crowded (to me) center. Oh well, lots more blocks. I had even dyed the background for this one -- a pale yellow as white was too stark.
You can see the quilting a bit here. I did like flower petals as that is what it looked like to me. I like the colors but the quilt is not my favorite. I followed the lines of the dyeing in most of the side blocks and they did look pretty good -- definitely an improvement over no quilting. The quilt is 85 x 85 inches so will fit nicely on a queen sized bed! I believe it is Mandala 4.
I left most of my dyed blocks in NC except for the ones that I gave to Julia for selling I did pull this one out of the bunch as I just liked it. Now have to decide whether it will be a pillow or a smallish wall hanging. I am leaning to pillow. It is 23 x 23 inches and just nicely balanced with pretty colors.
And just to make life interesting, at 6:30 in the morning they started tearing up our lawn and the street in front of our house. We can still get out the driveway but in a few days, they will be tearing up all along the property line and we won't be able to get out our driveway or down the street. Hope it is not for too long. And how do we get our mail and paper? I feel more sorry for our next door neighbor who has these gorgeous gardens that are going to be ripped up. I think he has already started moving some things. Arghhh...
Today was spent getting ready for a class I have in about 10 days. Cutting strips while watching tv is very relaxing and I have a bag full of beige, yellow, blue, purple and green strips for a class on hexagon log cabins which looked like just fun. Playing with one of the mandalas folding and refolding gave me an idea of what to do with some I didn't care for as much as others.
I took this square and cut into quarters and then each section into quarters again resulting in the following:
The ones on the top row would have been vastly improved with insertions of other colors before sewing them back together but the two on the bottom row aren't bad.
I decided that these would be an excellent exercise to practice some quilting before I approached the bigger quilts. I decided this was a good sacrifice for the cause!! If you haven't figured it out, I basically had taken those sixteen squares I made cutting up the 22 inch block and matched each with the other three squares that were in the same position in the bigger block. I then trimmed down the blocks so they were 10 x 10 inches. I quickly backed this with batting and some random dyed fabric and played with some quilting.
I should comment here that I had decided not to try to follow the lines of the mandala for quilting but to quilt a pattern over the block.
My first step in quilting was to do straight lines following the fold lines, so corner to corner and then bisecting each side. At this point, I took out the pins as it was stabilized. I had looked at Pinterest for inspiration but did my own design. Pinterest gave me the ideas to just ignore the lines in the mandala though.
I chose a bright blue thread and you can see it pretty much just blends in unless you look very close. I haven't decided whether I will go with darker or lighter thread ultimately. I also have some nice blue/aqua variegated that I might use.
Here you can see the quilting more closely. I think I have the right idea. The quilting isn't going to show unless you get close, and then it will be a surprise which is what I like in quilts -- a different look when close or far away.
There was enough batting and backing hanging on the sides, that I could do a little border. Now to decide whether to just finish it off or combine it with other blocks.
Start to finish from cutting up the squares to having a finished quilted piece took about an hour altogether!!
Now to just get these finished tops basted and quilted!!
The sunset at Ft. Fisher a few days ago was about the best yet imho! A few of us were clicking away and just oohing and aahing it was so gorgeous. I will post just a few of the 150 photos I took over period of about 20 minutes as it was everchanging.
There is definitely going to be a quilt from one of these or a combination of some of them. the colors were so inspiring -- especially the dark blues and the bright oranges.
This was one of the best vertical views. No wonder we were so excited!
For three days I have been down to Ft. Fisher trying to catch sight of the Harlequin Ducks which have been reported down there. Nothing on the first day but several nice Black Scoters were there on day 2.
A real treat on that day was a Sun Dog appearing through the trees at almost dusk. These are rainbow like cloud formations caused by the reflection off ice crystals.
Another view where you can see the sun dog more clearly.
On Day 3, I finally saw a couple of the Harlequin Ducks. I took many many pictures but the birds were so far out, I was afraid none would be good enough to post at all. I was surprised that several were pretty good. This is a male with his very distinctive spots. You literally could barely tell what they were even through the telephoto lens! A nice man was there with a spotting scope so we could see where the birds were!
This is the juvenile Harlequin and is not so colorful.
Just realized I left this picture of the blog. It really shows the colors of the Harlequin Duck and certainly shows the colors of the male Bufflehead as well!!\
Finished with the "moment of nature" and back to quilts. This is the center of the new quilt using the mandalas. I feel the need to frame all of these.
All the intermediate mandalas on point are done here and in place.
Auditioning the background colors for both the star points and the ultimate background. I didn't have enough of the yellow, so dyed two yards with friends last week
The center of the quilt is all completed here nd just have to add the borders. It is already 72 x 72!! Looks like it will be a queen sized quilt..
It's now 84 x 84 and used up every scrap of the background yellow and the two greens. I think I am done with mandalas for a bit except for just making some simple framed ones. Now onto the machine quilting which I am feeling more confident about all the time. I did switch around the mandalas a bit so it would look more balanced to me.