Showing posts with label monoprinting. Show all posts

Sunday, August 6, 2017

A Day of Painting

How is this for the background for a day of painting?  Right on the Erie Canal in western Upstate NY.

What a lovely day and nice group of ladies to play with!


I was able (to my surprise) to share some techniques that they hadn't used before which were pretty simple but were because of my long time ago experience with painting with acrylics on fabric.  I don't think I even have much on my blog about painting with acrylics and I have had the blog for ten years now!  So it was a re-introduction to me and also was a little tricky as I hadn't used the type of paints that I used yesterday.  All this was complicated by the fact that I had left most of my paints (I thought) down in NC.  I found  a bin full of paints though, a lot of which were dried out, they were so old.  They were full bodied paints or paint concentrates and acrylic extender.  Fortunately I still had some textile medium as well.  


This is Stephanie giving me a hard time but I caught her after she started laughing at her antics.  If you look closely at the piece she is working on, you will see a piece of polyester fleece underneath it.  This is perhaps my best contribution to painting on fabric with acrylics. I discovered I didn't like the kind of plastic-y feel that the fabric had when left to dry on a piece of plastic (how I was taught).  I tried putting another piece of fabric behind it but if it wasn't ironed, it left marks on the fabric above too.  So I finally settled on poly fleece -- no wrinkles and easily washed and wicks just enough of the paint away.  I especially used it when I was doing the dyed fabrics where I wanted the salt effects.  

This is one of Stephanie's fabrics where she painted with greatly diluted acrylics and then put sea salt on top and set it out to dry.  It will be even more gorgeous after she irons it.  It is amazing how ironing changes the look of these painted pieces.  I don't know which paints she was using as we had quite a variety to choose from.

I think this is one of Sue's but maybe wrong there.  She was using a lot of white on white fabrics and the effects on several were stunning.  It was tough to take pictures as the wind was blowing the pieces all over the lawn!

This is one of Janet's that I just loved!

A technique that I demonstrated was a monoprint technique using "fun foam", something many of the fusible things at Joanns are made from.  Basically the fun foam is glued to a piece of plexiglass and then you paint it and then use it as a stamp.  I learned this technique using dyes in a class with Ann Johnston.  We did a lot more mark making on the stamps in her class.  I was using full bodied Golden acrylics here which did not want to dissolve more in the water so it was a bit difficult.  I generally use the Golden Fluid acrylics when doing marbling and "water color" techniques with paints.  I have quite a large selection of these full bodied acrylics so will have to figure out something!!

The next three were done by applying the paints over a dampened piece of fabric (I used the cheapest of the Joann's cottons here as I had a whole bolt).  I then just randomly added colors in kind of stripes across the fabric.  Then I accordion folded it and added a pearlescent paint to the edge.  These were not as successful as pieces I have done in the past but are okay.

 Again I was using the full bodied acrylics and trying to water them down enough.  I also added a goodly amount of textile medium to each of the colors (I only used primaries except for one purple).  A few of the pieces of salt we were using obviously landed on some of these pieces as they were lying folded up on their edge.  That accounts for the whitish spots.


This was a piece that I had just painted and happened to take a picture of while it was sitting there.  After I got it home, I decided that it could use  a little salt treatment so I spread some sea salt on it and spritzed it with water hoping the colors would move a bit.  All of these six pieces were done with dampened fabric by the way.

This is what the piece looked like after it dried (overnight a part of the next day) and was ironed.  Think there was almost too much movement!!

The salt was applied here right after I painted it.

This was probably my favorite for the day.  I think these will all turn into cosmetic bags.  The surprising things were that the hand of the fabric was stiff but not intolerable and the backs were almost identical to the fronts which really surprised me.


This is a closeup of one of the stamps on the monoprinted piece.  I just globbed a paintbrush end to add the little bit of pattern on top of the monoprint.


Thursday, July 7, 2011

Monoprinting with Thickened MX Fiber Reactive Dyes at RAFA

Part of our day long monthly meetings is a short program to expose members to some process or technique with which they may not be familiar. These are not intended to be full blown classes but are usually longer than just a demo. Different members of the group are called upon to share a sample of what they may be teaching professionally or just something they like to do. This ranges through all types of surface design as well as felting or working with beads or even finger weaving.

The above is purple brushed on new heavy weight plastic on the left and purple smeared onto a sheet of the play foam for kids as well as some stamping with painted blocks.


Today I volunteered to do something related to dye painting and chose something relatively simple which was monoprinting. In various classes I have been in, we have done an assortment of techniques and I tried to share as much as time would allow.

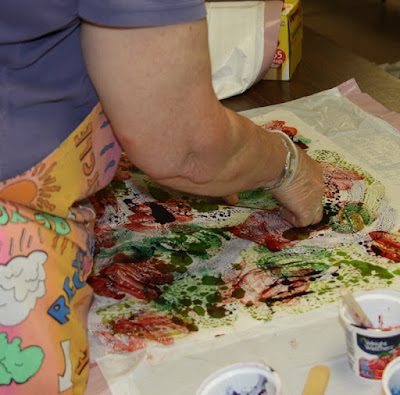
Here, someone dropped some colors onto the foam or plastic, put the fabric on top of and then brayered the fabric causing the dye to spread out. I love the effects you get doing this.

I asked everyone to bring pfd fabric that was prepared by soaking in soda ash water (1/2 cup soda ash to 1 gal of water) and then drying on a line. I suggested fat quarters. I also asked they bring small cups for their dyes and foam brushes and white trash bags for transport and for their workspace. A brayer or roller foam brush was optional. I also sold some prepared fabric for those who were new to dyeing (we had two in the class that had never used MX dyes before) and several that were pretty expert.

I provided 2 ft x 2 ft masonite boards (I get the 4 x 8 ones cut down at Lowes and they are cheap). I also provided some heavy plastic pieces (about fat quarter's worth) and pieces of skinny foam (the kinds kids use and which I get in 3 ft x 5 ft pieces at Joanns). In addition, I had one large sheet of acrylic as well as several small pieces of that and foam. I also made up liquid dyes (sun yellow, fuchsia and intense blue) and print paste (1 cup powder to 3 cups water). I had some miscellaneous sticks and whisks for stirring. I used squeeze bottles for the dyes as that was the most effective for mixing it with the print paste with 10 people. I used up almost all the print paste I brought (6 cups) but had lots of dye left over (I made a quart of 10% solution for the three colors).

The techniques included:

1. slathering with brushes or sprinkling dyes on either plastic, masonite, foam or acrylic until you got colors and a pattern you liked. Then place the fabric on the surface and use a brayer to insure nice even coverage. As the surfaces are used more and more, there is less puddling of the dyes. Of course you can do the same piece over and over again too.

2. slathering dyes on a small piece of foam and then using some sort of pointed object to put lines on the foam and then using it as you would a rubber stamp on the fabric. I also had various different kinds of tile group spreaders with different patterns to use.

Unfortunately, it was a very humid day so the print paste was not as thick as I would have liked. I would do it thicker the next time. People in the class were incredibly creative including one person who brought a toy truck in and use it to march across the surface.

Here someone painted colors onto the foam and then ran the toy truck all over the surface and then printed the fabric!!


Here Donna is working on a piece.


Joyce decided to do some direct dyeing by painting directly onto the fabric. Joyce had done monoprinting before but not with fabric and really enjoyed it.


Here Val took some already dyed fabric and monoprinted on top.


Julie brought in a tshirt that had been ruined by some stains. She splashed some thickened dyes onto a piece of plastic and then pressed the tshirt onto it to give this Jackson Pollack like result. She was thrilled as the stains no longer showed and the tshirt was retrieved!

Thursday, August 12, 2010

Painting with Thickened Dyes (Dye Painting)

My dyes are almost a week old but still seem to be producing excellent results. I suspect this is because my basement is cool(er) and because I make dye concentrates at 10% (less water with which to bond ). The last pretreated yardage is in the dryer awaiting the results of yesterday's dye painting. I decided just to take some of the remaining dyes, thicken them and roll and sponge them directly onto the cloth rather than monoprinting. I figured this was a safer approach to insure some color as the dyes should be a lot weaker now after a week.


This is a closeup of the first piece. This was literally done with the colors I had left. First I sponged on blues and greens all over and then sponged on a little golden yellow in empty spaces and then sponged on the mixing red mixed with a little strong orange.
I just directly rollered on colors onto the piece of twill - red on one side of the roller and golden yellow on the other side. It of course made a lot of orange in the middle. Then I outlined some of the shapes with mixing blue. I can't believe how strong these dyes still are -- they are a week old and were only 5% to begin with.


This is of course a closeup of the previous one.


Dye Painting and Monoprinting Tips


1. Use a high concentration of dye to urea water (always use urea water when painting or printing with dyes). I use a 10% solution which is about 2 tbsps./cup of urea water.


2. Make up your dyes a couple of hours before you need them -- yellow especially doesn't want to stay in solution so just keep adding urea powder and stirring before using.


3. Make up your print past the night before -- very thick which is 5 1/2 tbsps/cup of urea water. Put the powder in first and then add the water while stirring. It will be cloudy at first but will thicken and become translucent.


4. Presoak your scoured fabric in soda ash solution for at least 15 minutes and let dry the day before. Cut into the size pieces with which you want to work.


5. A very thick print dye paint can be made with equal parts of print paste and the dye. This will give you then a 5% concentration which is a dark shade of the color. If you want to thin down a little more, use either more dye (darker color) or a little urea water (lighter color).


6. Play with all different concentrations of dye to print paste. You can get it pretty thin before it starts seeping around to the other colors.


7. If you decide to paint with just dyes (no thickener), put another piece of cloth or fleece underneath so you don't get the plastic bubbly effect (unless you want that). Don't soak it too thoroughly or you will force all the soda ash out of the fabric.


8. WHEN YOU ARE PAINTING, PUT ONLY ENOUGH THICKENED DYES THAT YOU WILL USE IN THE NEXT 15 MINUTES INTO ANOTHER CONTAINER. USE ONLY THAT CONTAINER TO DIP YOUR PAINTBRUSH, ROLLER, SPONGE. THE REASON FOR THIS IS THAT SOME SODA ASH WILL TRANSFER BACK TO YOUR APPLICATOR WHILE YOU ARE PAINTING AND THUS MAKE THE DYES VERY REACTIVE WITH A SHORT LIFE (MAYBE AN HOUR). Probably the only exception to this is if you are using very tiny brushes and thus very little transfer back.
9. Cover with a plastic bag loosely. If your dyes are very liquid, expect to see some movement of color. If they are pretty stiff from print paste, they will stay put and there will be no bleeding.


My process now is to let the fabrics batch for about 4 hours and then to roll them up in the plastic I was covering them with. I then fold the bundle and put in my old microwave over for about 4 min/yard, checking a couple of times. This insures that maximum dye has reacted with fiber. Even though these are called cold water dyes, they are even more highly reactive at hotter temps (as long as you don't have too much water). For silk I would use a lot less time and check more frequently. All microwaves are a little different. Mine is an old clunker without even a turntable but it is big.

Thursday, August 5, 2010

August RAFA !


I had to show off my three visors that I dye painted with the thickened dyes yesterday! So Gail, which one do you want (if any)?

It was great to finally see some of the pieces that were made at QBL. RAFA members took classes from Rosalie Dace, Leslie Riley, Jeannette DiNicolas-Meyer and Elin Noble. These first two pieces were from Rosalie's second week class called Earth, Wind and Fire I believe. Janet did the first one and Caris Burton did the one below. Neither is finished but awesome starts and they had great little studies with them as well.


Caris also showed her first attempt at Deconstructed Screen Printing which I think is awesome!! She learned it from a book rather than a class. She does everything well!!
Caren Betlinski shared her piece from the first week at QBL with Rosalie Dace. This week focused on circles. Priscilla also did a series of three pieces which were awesome and which you can see on her blog. They are much bigger looking in person than on the blog.
The folks who took Elin Noble's Indigo dyeing class will have their pieces for the next meeting. Some others decided they were only going to bring in finished pieces!

Our afternoon work session was led by our own Diane Miller who has a well established reputation as a knitter as well as a vendor of hand dyed yarns. She was kind enough to share with us her techniques of using MX dyes using citric acid instead of soda ash for protein based fibers (wool and silk). She also had examples and thoughts about other acid dyes (including Kool Aid!). In this picture, one of the class members is painting her skein of wool yarn with the dyes after they had been soaking in a citric acid solution. Amazingly, even without heat, the yarn just sucked up the colors. Diane uses a much lower concentration when using the MX dyes in acid dyeing (1 %). It was great information. She said she will be posting instructions on her blog which I have listed her for your ease of use!


It was nice to be back with the RAFA members although I did go on a bit of a rant about the forbidding of photography at Quilting by the Lake. I should explain that I don't mind that I personally can't take photos (although I won't go because of that), I rant because I think it is a dumb idea and still won't get the affect that they want! People will always take pictures, even when told not to (they will sneak out their cell phones these days) or use their binoculars or some other tiny camera. Most people like myself just want to give a little good publicity to a person or a venue that they enjoyed and respect personal positions. Many people will be turned off by the fact that they can't study even for their own personal use quilts that they liked (although I guarantee that there were people taking pictures and publishing them).
Thank goodness I chose to buy a camera rather than spending it on the QBL the class I was going to take! Next year, I will take the money I would have spent (I went for ten years) and go to Yellowstone again maybe!

Wednesday, August 4, 2010

Monoprinting - First Results

This is the mainly blue monoprint that I did first. I basically just dripped turquoise and mixing blue all over the surface and took a flat scraper and moved it around. Later I filled in some yellow and a little red. It is about 30" x 60" on cotton twill.


This is a closeup of the previous piece showing a bit more detail.

This is the mostly warm color piece. I used mixing red, strong orange and some yellow but added a bit of turquoise later on. I used a foot wide tile scraper to apply the color to the monoprinting surface.


This piece and the next are just closeups of the warm colored piece which is about the same size as the first piece.


These were two very small pieces (maybe 6" x 12") where I played with using a brush to lay down some color. I added salt to the one on the right and just applied color later filling in the white areas.

The heron piece which is now called "Oh No, Not Another Heron Standing in the Reeds". This was in honor of the person on the SAQA list who was bemoaning the fact that another heron standing in reeds was not her idea of art! Well, maybe not, but I like him. The quilt blocks along the left edge are called Great Blue Heron. If you have followed my blog, he used to stand right in the middle of the piece but I decided that compositionally he was better placed closer to the edge and so I needed something on the left or it would be very boring. In the original picture that I took this from, he was standing on a fish filleting table but he does look more at home amongst the reeds.

Tuesday, August 3, 2010

Monoprinting With Dyes -- Beth Style

For those who are not familiar with this term, it basically means making one print of something (marbling is a subset of monoprinting). There are many ways of achieving monoprints, but the type I have done was to paint either paints or dyes onto some surface, spread a piece of fabric on top and then use a brayer rolled on top of the fabric to make sure that all the color adheres to the cloth. There are all sorts of surfaces on which you can paint and all sorts of interesting things you can put on the surface. Your imagination is your limit. You can really mix the colors or keep them separate -- you can leave lots of white space or none! Sometimes, you can even get a "ghost" print which is a pale copy of the first print and sometimes a good start on another piece of cloth. It is fingerpainting if you want it to be!

It has been awhile since I have done any monoprinting but it is an activity that I truly love (as evidenced by my 125 yards of marbled fabric). So back to the dyes. As I am trying to use up some of my aging dyes, I had to limit my pallette a bit (always a struggle for me) as bright blue, fuchsia and navy are pretty much among the missing. Grape, turquoise, mixing red, sun yellow, golden yellow, strong orange, burnt orange and mixing blue were still to be used though.

I decided the baby tshirt should be grape and turquoise so we shall see how that comes out. (I am not liking the quality of the fabric for dyeing as much as my cheapie K Mart tshirts though - it doesn't seem to take the color as well but we shall see).

My setup for monoprinting differed a bit this time and so did my process -- all because of my inherent impatience! I had a bunch of twill that I had bought at Joanns (60 in wide) that I had dyed before and it had dyed beautifully. It makes great aprons and tote bags!

When I took Ann Johnston's monoprinting class a few years back, one of the students in the class was using the skinny foam that you can buy in 30 x 60 inch rolled up sheets at Joanns -- the stuff from which they make those foam shapes for kids. They are about 1/4 inch thick and seemed to hold the dye very well. (It is great stuff from which to make "rubber" stamps as well.) In the past I have used either plastic sheets, glass, thin acrylic sheets or white bathroom board as a surface from which to monoprint.

I made up about 1/2 cup of thickened dyes of each color by taking really thick print paste and mixing it 1:1 with 10% liquid MX dyes. I rolled out this sheet of foam and poured dyes all over the whole sheet. I then used scrapers and tile grout grooved scrapers to move the dye around. Then I laid a rather large piece of this twill (which had been pre- treated with a soda ash solution and dried) over it and used a brayer to roll over the back of the whole piece. The first piece was primarily blues and purples but I couldn't resist throwing some yellows on at the end. The second piece was warm colors. I then picked up each of the monoprinted pieces, and found a nice piece of plastic for it to lay on and covered it with another piece of plastic.

I then just fooled around with small pieces painting the dye on the foam and lifting it with small pieces of fabric and then doing some painting directly on top -- I hate white!

Later I uncovered my pieces (maybe an hour later) and painted some more color onto the places that hadn't picked up as much dye during the monoprinting process. After about three hours I decided it was time to finish these suckers off as I was dying to see what they looked like!! They had been in my basement which is notoriously cool even in the summer and not a great place for batching and they were really too unwieldy to bring upstairs and outside. So I rolled up the pieces one at a time in their plastic so there wouldn't be any movement of color and nuked them for about 4 minutes until they were steamy hot (each piece was about 30 inches by 60 inches).

My washing process is to rinse the soda ash out in two bucketsful of water, first cold and then warm. I then wash for 1/2 hour in the hottest cycle of the washer with the highest level of water with some synthrapol and do a double rinse after that. If I were selling it, I would do this process twice.

Lessons Learned this Time:


1. Remember which is the alum bucket and which is the soda ash bucket. Alum does nothing for MX dyes!! (I know)

2. Don't work on pieces of fabric that are 60 inches by 36 when experimenting!

3. When painting over a water soluble resist like rice paste, always use thickened dyes rather than the liquid dyes unless you like fuzzy.

4. If you pretend your microwave is a steamer and use plastic instead of paper to separate the layers, everything works just fine!

5. Sprinkling salt on a layer of dyes on a piece of foam doesn't drag the color like it does on fabric but it does concentrate the color in small dots.

6. Dyeing over the soy paint is like adding a layer of dye -- the soy paint layer does not act like a paint and resist the color as acrylics do.

7. Mixing Blue and Turquoise mixed together make an awesome blue!

I can't wait to get back down to the dye table tomorrow!! Pictures tomorrow as well!

Tuesday, July 29, 2008

Marbellishment - Day 2

Another fantastic day at QBL! Besides the wonderful class and truly talented classmates, the weather has been delicious!! Cool breezes, some sunshine and temps in the high 70's. Doesn't get better than this at QBL -- just trying to make us feel bad that we won't be back on this campus next year!


I am learning so much and I am beginning to be able to sense how things are going to go. I don't know when I ever would have spent five days just on this one technique back in the "real world". I will have to take extensive notes to myself about how I have done things and what I am discovering although the whole technique seems to be so intuitively driven. You marble with your whole mind. Something that works one moment literally will not work at all the next so you are constantly shifting and discovering. It feels a little bit like it did when I first learned fabric dyeing and could never duplicate what I had done before -- either color or pattern. Now that is a walk in the park. Elin assures us that there is much unknown and many have spent much time trying to "tame the beast". Coincidentally, the ex of one of the woman in the group had a degree in surface tension which is what marbling is all about.


Now if I could just figure out a way (other than shaving cream) to marble with MX....... Do I sense another challenge coming on as I know it is impossible but maybe I can find a way to mimic it.......hmmmm.....

Just your random application of blue and yellow paints plus a little marbellishment.

This is again playing with the yellows and blues and using a technique of laying down the piece in waves. It is pretty subtle on this one, but the effect is there. Probably better if you blew up the picture by double clicking.


I couldn't help myself on this one. I applied the navy and tried some other colors on it and they just didn't cooperate and I really liked just the navy and white so left it alone. Again, double click to see it bigger

These three pieces were done by another RAFA member - Sarah Terry working on some orange that she just hated. Didn't they turn out well!

Monday, July 28, 2008

A Marbelous Day at QBL


Well, it is the end of the first day and I am pooped already. As usual, my class is the furthest distant classroom from the dorm I am staying in. It doesn't matter which dorm I stay in, this is always the case!! Anyway, lots of walking.


Well, the class I am taking is Marbling which is a monoprinting technique which uses acrylic paints which float on a size and then you print fabric that has been pre-treated with alum (yes, the same stuff you use for pickles).


Elin Noble is the teacher and as usual she is fantastic! I have picked up enough new hints today that I have gotten my money's worth already!! That always seems to be the way with Elin's classes. She is extremely knowledgeable and totally likeable as well so her classes are always entertaining as well as filled with information! I really arrogantly wasn't sure how much I could learn new. I have marbled (mostly badly) a bit in the past so figured I would just have a relaxing week of playing. Well, it is that but I am also going with Elin's totally new approach to it which is great.


This is the classroom which is really half of the gym for the school. We have tarps and plastic everywhere!

These were my first three attempts. The middle one is my very first. If you cut very small pieces from them, they might be okay!
This is the class's output hanging on lines. Everyone seems to be doing more than me and much nicer pieces! Oh well, I am old...


I really liked this one a lot.
I thought these were very cool also.

Thursday, May 22, 2008

Monoprinting with MX Fiber Reactive Dyes - Part 2

As discussed in the previous post, there are many options open to you when deciding you want to monoprint. For all of the options discussed, I used pre-treated PFD fabric. PFD fabric is fabric with no whiteners, permanent press finishes or anything that might interfere with the absorbtion of the dyes. I personally prefer using mercerized cottons, any 100% rayon or rayon/linen mixtures. You can also use tencel, bamboo or silk or any combination of those fibers as they are all cellulosic fibers (except for silk which acts like both a protein and a cellulosic fiber). I pre-treat the fabric by first washing it with a little soda ash and synthrapol, drying it and than soaking it in a soda ash solution (9 tbsps soda ash/gallon of water) for about 15 minutes. I then line dry the fabric and press it with the coolest iron that will press it flat. You can also use damp or wet fabrics with this technique and you will get a different result. I prefer the sharpness of the images using dried pre-treated fabric though.

There are several surfaces that I have used to monoprint fabric. These include heavy duty tablecloth plastic (the kind you buy at Joanns by the yard), laminated masonite ($10 for a 4 x 8 white sheet at your local home improvement store), plexiglass, and (one of my favorites) the large rolls of fun foam that you find at Joanns. All will give you different results. Dyes tend to bead up more on the plastic and brushstrokes are more obvious. The foam provides a little texture which hides some of the above a bit.

Tne of the secrets of using thickened dyes is to realize that although you might use the initial recipes contained in various dye books for making the thickened dye, you can add urea water to the mixture until it is the thickness that you like working with the best. If you live in the dryer climates, it is very important to use urea when making up your dyes for direct dyeing or monoprinting applications. My process is to make a very thick print paste mixture and to thin it down as I use it. This mixture will last for a pretty long time if not exposed to too much warmth. A very thick mixture is 5 tsp powdered print paste/cup of urea water. Urea water is made with 5 1/2 tbsps urea/cup of water.

I tend to use about equal parts urea water and the thick print paste mixture when monoprinting. I also use dyes that are about 10% concentrations (10 mg per 100 ml of urea water or 2 tbsps (roughly) dye powder per 1 cup of urea water. I mix up equal parts of my dye mixture with the print past in small portions (about 1/4 cup of each color I am going to use).

Then the fun begins!! Just slather some color onto whatever of the surfaces you have chosen. Cover up that surface with whichever color you want to use. If you have used thick dye colors, it will just sit there where you put it. If you have used very thin colors, they will bead up a little or a lot -- not always that predictable. If you used the thickened colors, you can then use any implement of your choice to make patterns in the dyes. Just scrape away the color or add brushstrokes or swirls. Best to avoid using complementary colors with too much mixing as you can get mud! After you have a surface that you like, just press your fabric down onto it and voila, a print. Let it sit for about four hours covered with plastic and then wash out. Sometimes you can get more than one print but the second will be a lot lighter.

This was made by applying the very lightly thickened dyes onto a piece of tablecloth plastic. The surface beads up a lot especially when using plastic that hasn't been used before. I then pressed the fabric onto the surface. When it dried, I applied thin dyes over the surface. I love that pitted surface you get.

I always try to have a surface that is at least as big as the cloth I am printing onto so either work with smaller pieces of fabric or find a surface that is much larger. The foam sheets come in either come in sizes form letter size to table top size.


Another approach is to take a small piece of foam or plexiglass or plastic sheet and directly paint onto it and then apply it like a stamp onto a piece of fabric. This is an example of one of the 200 images (each about 4 x 6 inches) that I created using this technique. I glopped pretty thickened dyes onto a piece of plexiglas and then took the broken end of a foam brush and scratch lines in. The circles were the top to the plastic containers. I love using the foam for this as well.


This was another direct dye application where I rolled a paint roller into thickened dyes and then painted directly onto the fabric with the roller. I would put a number of colors onto the roller and then just apply it.


This piece was made using a piece of plexiglas and applying thickened dyes onto it and then using it as a stamp onto the fabric. I also used thickened dyes in an applicator bottle for the lines. I then overpainted (after it dried) with thinned dyes and then washed everything out. As the days wear on, the thickened black dyes definitely weaken.