Showing posts with label Passacaglia. Show all posts

Friday, December 9, 2022

Passacaglia Quilt Finished and a New Beginning for 1930's Farmer's Wife Blocks


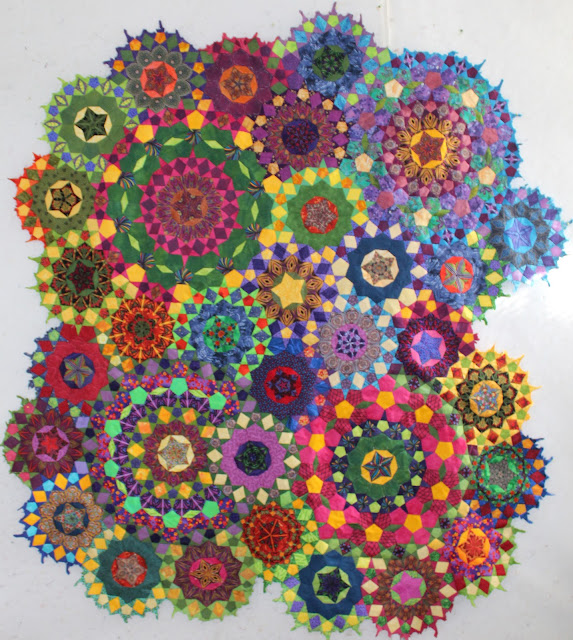
Well, I finally finished the Passacaglia quilt!  I did some things differently from the original.  I didn't cut off parts of the quilt just to square it up like the book had you do.  Why do all that piecing just to discard it?  I appliqued it down to a background and did cut off the point of the stars as there was just no way to easily applique those tiny ends down so I just tucked them under.  I then cut away all the background behind the main part of the quilt.  This background was had dyed just for this.  At first I was going to do yellow but didn't care for how it looked so overdyed the yellow with blue to get this very dark green/blue which kind of goes into the background!  It measures 60 across by 65 down.  

The machine quilting was all freehand.  I chose to go with the machine quilting using matching thread for the most part as I didn't want the quilting to detract.  It is mostly in the "ditch".  It is not a quilt you should look at from a foot away but 3 feet away it isn't bad!  The pieces were so tiny, I have no idea how anyone could contemplate hand quilting it but I know a lot have!  Most of the centers of the circles were "fussy-cut" for my usual kaleidoscopic effect.  My daughter indicated she wanted to hang it on her high wall but don't know whether she realizes the size.  I won't be insulted if she changes her mind!

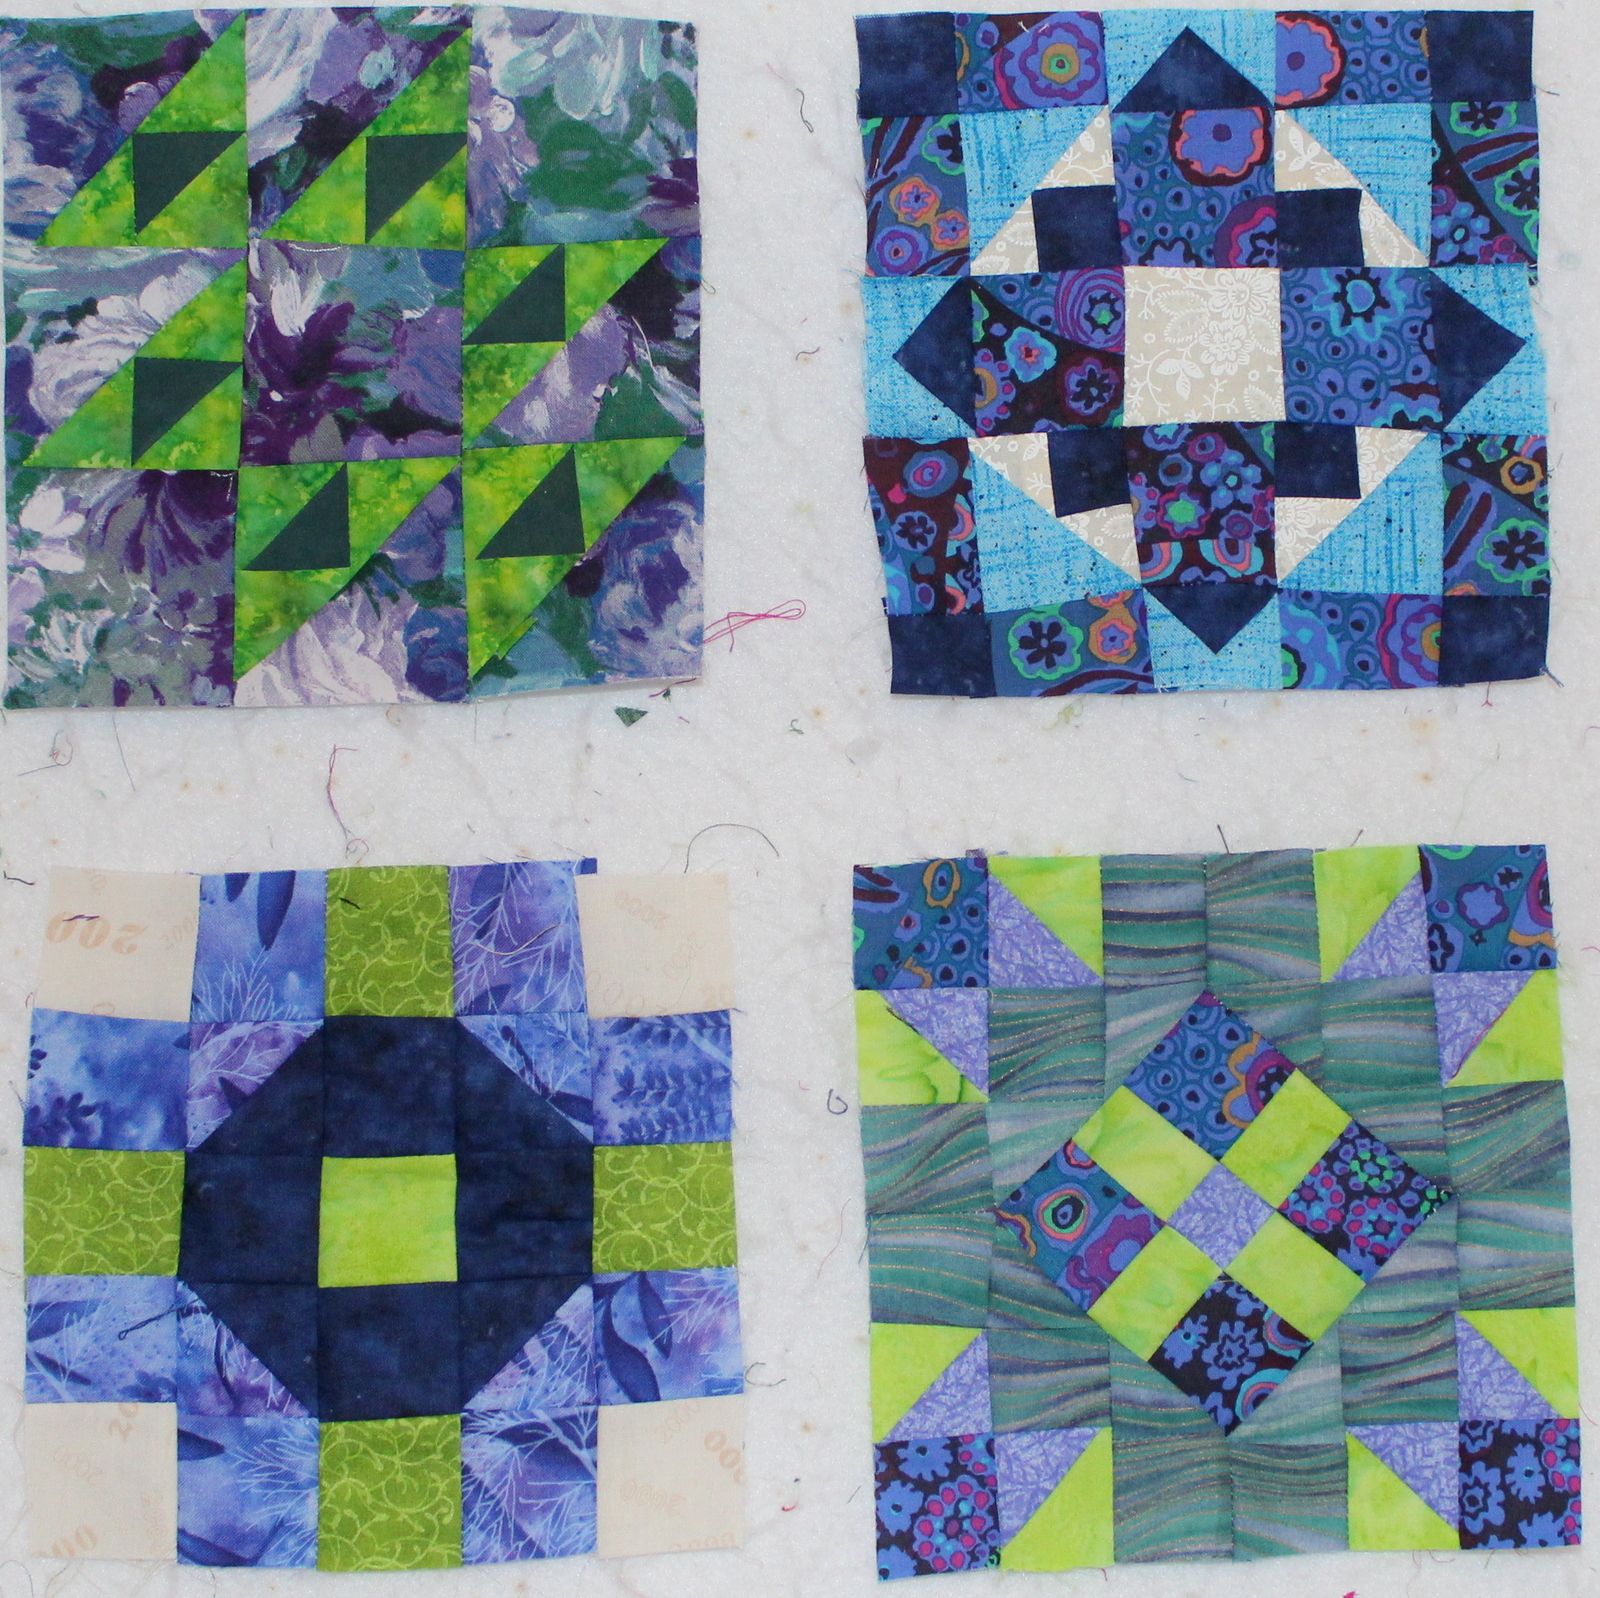
As we had an "Open Sew" day at Guild, I decided to work on the blocks from the 1930's Farmer's Wife book.  These blocks are a LOT harder than the ones in the 1920's book, many of which had over 50 pieces each!!  Some of these blocks are on an 8 x 8 grid which means the individual pieces in the block finish to 3/4 inch sometimes!!  I was literally stumped on how to piece one today but have edited the pattern and think now I can do it -- it is on an 8 x 8 guild and involves partial seams!

You can see I have chosen a different palette for this one.  I am going with old faithful blues, greens and beige/whites with a touch of purple thrown in and maybe a little pale yellow at some point.


Friday, July 22, 2022

Back to the Passacaglia and of Course a New Stack and Whack


Well, I finally got back to the final bits of the Passacaglia sewing in the few pieces around the outside filling in areas that needed a bit more.  Then came the chore I was not at all looking forward to and had put off as long as possible.  Because I couldn't believe the pattern would have you cut off large areas that you had painstakingly pieced, I am appliquing the piece down on a dark green background which will take forever I am afraid.  But FIRST, I needed to get rid of all the paper on all of those tiny pieces that the of which the quilt is made!  I am sure they amount to 1000's.

My first step was to soak the whole thing in warm water in my bathtub.  This was particularly scary as I used a lot of dark hand dyes and sometimes I am  not as good about washing enough times as I should be and I was afraid of some serious bleeding.  I tried taking the paper pieces out kneeling by the tub but only lasted about 5 minutes.  I then grabbed a fairly large plastic box and wrung out the top as best I could and put it into the box and returned to my sewing room where I proceeded to take out the pieces.  The good news is that the glue that I used  which was Roxanne's Baste-it  worked very well.  I had used some other glue earlier and luckily had only used it on a few pieces as it did not work.  The freezer paper that I had ironed down released immediately so that was also good.  Also the dissolvable thread I had used initially also dissolved completely.  

I have probably spent a good 10 hours so far taking out paper!!  The first couple of days I did it with the wet top.  After I got out all the larger pieces,  I decided to throw the quilt into the dryer with the tiny tiny star points still mostly unpulled as they were super difficult to get out.  I was surprised that even fairly wet, it dried without too much trouble and didn't leave a bunch of paper in the dryer (which is why I didn't use the washing machine}.  I then sat in front of the tv and started trying to get the papers out of those tiny pieces (3/4 of an inch by about 3/8 inch}.  There are 100s and 100s of these pieces and I have spent at least four hours so far pulling out the papers.  I have discovered it is much much easier to pull out the dry pieces of paper and would definitely somehow dry the top if I were ever foolish enough to do this kind of quilt again.  Tweezers also help getting into those tiny areas and it is not a bad way to spend time in front of the television as it doesn't take a lot of concentration, just searching the top for the papers.  As the pieces are so small the seam allowances cover up the papers so you have to go by feel!
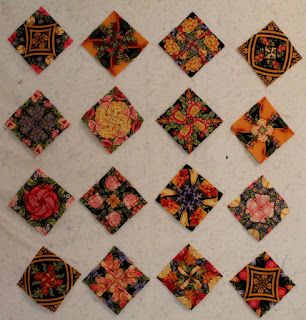
I found four small panels left over from a quilt  made a few years ago and decided it was time to do something with it and since I have been on a stack and whack kick, here are the blocks.


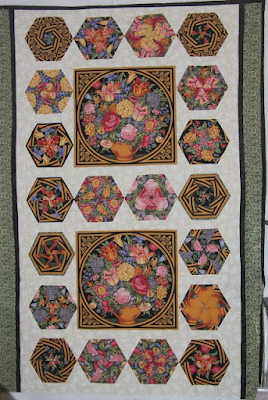
 Here is the original quilt using the panels which faced in  opposite directions!                                 

 It was a little unusual as there were only three repeats so I alternated on the hexie blocks!  For some reason I had 4 leftover panels that were all facing in the same direction which is what I used for the blocks above.  Good thing I keep my quilts on Pinterest as I couldn't find the blog entry with this quilt on it!

I had originally planned to only use the reddish orange, green and yellow but for some balance, decided to add the purple.  This was my first iteration which was okay.

For the final version, I did switch things up a bit so it is very balanced!  Because it is only 33 inches square, I will need to add some borders to make it a baby quilt.


At first, was only going to add the green and purple which was okay.


I finally decided to go with a thin strip of yellow -- I always seem to do this!


Isn't it truly amazing how different this quilt is from the original quilt using these blocks from the same panel!!



Wednesday, November 24, 2021

Making Progress!!

Well, the main  part of the La Passacaglia is all sewn together.  I have already added some pieces not in the pattern and still want to add a larger chunk on the right hand side and on the bottom.  Know what I am going to do but just have to do it!


Then I have to dye some background which is now complicated by the fact that our washer doesn't work and I need that for washing out the dyed fabric!!  I want to test doing applique with the papers and glue still in to see whether I have to do the washing of the piece before or after applique.


This is the first quarter of what I am calling DJ4 all machine quilted.  I have since finished the machine quilting on all four quarters.


This is a closeup of the stitching that I am doing in the whitish areas -- it is a double arc.  I have decided not to do it in the green.  I have done a lot of outline stitching in all the little blocks which is mostly invisible as I used matching thread as often as I could.  Quilting this in quarters made the job much much easier!  


Here is the right half of the quilt sewn together.  I messed up a number of times and thankfully the back is a very busy batik which hides some of the extra seams I had to do.  I was in a hurry and it was the end of the day -- big mistake but correctible.  It was very difficult to sew the sections together as there was so much quilting fairly close to the edge where you sew them together.  Lots of pins held it together and it mostly lined up.  I didn't make that mistake today.  I finished machine quilting the other two quarters and will wait until Friday to attempt to sew them together and then sew the two large sections together.  Then all I will have to do is the borders and binding.  It will be a decent sized quilt when done!


Thursday, November 11, 2021

Real Progress on Passacaglia Quilt and the Newest Dear Jane!

I always take pictures along the way for a good reason!  I can many times spot a booboo before it gets any further and it certainly was the case with this one although I got along further than usual!


This is the third quarter of the quilt with the correct orientation of the naughty block!


Each of the quarters is now done.  The batting arrived today so I will contemplate starting the quilting soon!  I am doing it in four separate sections so I will have to divide up the batting accordingly


The four quarters are mostly done and I only have to stitch the top and bottom together and add a couple of more rosettes to round things out.  I had to get it on the design wall to make sure things were properly aligned.


Here I was testing out a potential background color.  I haven't yet decided when to wash out the papers and fabric glue.  I also haven't decided whether to include the star points on the outside or not as they will be very difficult to applique down.


I am still finding blocks I made last summer while being laid up and this is the latest baby quilt incarnation!  I am going to put a medium blue border and then a dark blue binding to calm it down a bit.  I have made so many tops with this fabric which I picked up very cheaply in a Joann's sale!  It is perfect for stack and whacks.  


Friday, October 29, 2021

Baby Quilts are Done and Distributed!


Finally finished off the five baby quilts I had in process.  This was the one I did with the remaining blocks I had so I could use them all up!


This and the next one are almost identical!


This is one of the two block quilts I made.  This one was given away and the next one is for a special baby boy who hasn't quite arrived yet!


The Passacaglia is in four sections now but not sewn together yet.  I am making a couple of rosettes to fill in some spaces.  For some reason the bottom two sections didn't fit but luckily I had not sewn in the last block on the lower right so will make some adjustments.


Saturday, October 16, 2021

Passacaglia Progress, Last Stack and Whack and a Bird Break!!

Well, this is the last of the quilts made with the 104 blocks I had and it measures about 40 x 60.  I was convenient to have just dyed some bright green that was 60 inches wide and got used right away!


This is the left half of the Passacaglia just laid out on my design wall but the two halves are not sewn together.  I just wanted to get a glimpse of where I needed to add some more "stuff".  First,  of course, was that half done block on top.  As I mentioned before, the author has you chop off large portions of the rosettes to finish it and after all that stitching, there is no way I would do that!  I didn't have the fabric I used down here but managed to find some that is almost identical and made two more stars and diamonds to finish off that rosette.  I am also going to put rosettes in those two spaces on the left.  
Here I am auditioning a yellow that I think might make a good background.  I doubt I haqve enough in this piece but can dye some of the 60 inch wide cotton close to this color.  This was my experiement to get close to the tangerine color -- a dye I had run out of.  It was 4 parts sun yellow to 1 part golden yellow.  

I am now sewing together the large rosettes on the right side of the quilt and when I have the four sections completed I will sew them together.  This is taking much less time than I thought it would!  I have had to make some more diamonds to fit into places but that has been a piece of cake compared to getting some of those rosettes together!  My stitching is not delicate so the quilt will be one best viewed a couple of feet away!


I try to get over to my daughter's for a swim each day while the weather holds and always take my camera.  She spotted these two Pileated Woodpeckers who entertained us for easily 15 minutes.


This was my favorite of the pictures she took!  Mine were nowhere near as good!


The above is a Catbird and one of the pictures did show the red under his tail.  He was far far away!


This is an Eastern Phoebe and he has appeared multiple times in her yard.


There was quite a flock of Ibis on the corner the other morning!  There were about 20 of them -- adults and juveniles.


This is a Common Buckeye in my daughter's garden.
This is a gardenia bush which I didn't expect to see blooming this time of year!

The above is a Long-tailed Skipper butterfly.


This is a Red-bellied Woodpecker off in the distance.  She has trees all around her yard and has frequent nests and all sorts of critters including red fox this year and oppossums last year!  


Monday, October 11, 2021

Some Miscellaneous Upates!

I have had 104 of these stack and whack blocks done for a couple of years and decided it was time to finally put them all to use!  In a previous post, I showed the column  arrangement for a bigger quilt.  I decided I would utilize the rest for baby quilts and put nice babyish fabric on the backs.  This was the first top completed and measures 40 x 40.


This is the second one which I should complete today!


I had 18 blocks left and I like to make use of every block so came up with this arrangement.  I have since switched the blocks around so it is a semi-one block wonder!


A bit of a challenge trying  to get this one arranged the way I wanted.  I had managed to put individual units upside down and had to rip out stitching and thought I was finished but after looking at the picture, realized that one whole side was now upside down so today I will fix that.  I wanted them to alternate to give a little variety.  I will use the green for the binding.


The other day my friend Dianne and I did some ice dyeing and regular vat dyeing of some extra wide pfd fabric I had.  The top two are ice dyed, the top one mostly navy and the middle one a  mix of navy and grape dyes.  The bottom two are just fat dyed, the top one grape with a bit of eggplant and the bottom one New Navy which looks like denim blue to me!


The top one  here was ice dyed and is a mix of the navies and the greens below.  It is much prettier in person.  For some reason, the color didn't come through so much in this picture.  The bottom two are vat dyed, the top one being a mix of sun yellow and Dharma's Desert Green and the bottom one being Bright Green.  I can never have too much lime green!!


My intention for the dyeing was to make some backs so each of the pieces is about 45 inches x 60  inches.  Probably won't use the vat dyed fabrics for backs as my free motion stitching isn't good enough for a plain back!


This isn't a great picture as I took it at night with my phone!  It is the bottom left of the Passacaglia quilt which I finished sewing together last night.  The rosette in the furthest right position on the bottom (red and green) was wrong in the pattern so I had to add an extra star and diamond to what I thought was a completed rosette.  Of course, the fabric I used to make the original rosette was still in Rochester, I had to improvise and it is roughtly right and you would really have to look to find it!  I am going to add another rosette to the far left side.  The pattern literally calls for cutting off large portions of the rosettes when you add the border and there is no way I would ever do that so need to even things up a bit more and then I will applique onto something.  I haven't yet decided what color I will applique onto but am thinking a really really pale yellow.  I have considered black as well but the quilt will eventually tell me what it wants and I am powerless to object! 


Tuesday, September 28, 2021

Actually Getting Some Projects Further Along the Way!

This is a picture of all the rosettes done minus one on the bottom right.  I have since switched the upper right and lower right large rosettes back to the way they should be.  
A close-up of the bottom.


A close-up of the top.


I think I made these hexies a couple of years ago and I have a lot of them -- over a hundred so auditioning how I want to arrange the and how many quilts and what kind of quilts I want to make.    

They could be quilts I keep, Sweet Charity or smaller Neo-natal quilts.  

I decided that definitely I would do one with the vertical arrangement with some fabric in between.  Still have to decide how many rows and how wide to put the in-between fabrics.  I am sure I will have at least a thin strip of white surrounding each column.


I found this fabric when going through my stash this summer and thought I would use it for a 4 patch posie block as there were only 4 repeats and a little extra.  It looked like a good candidate to me.


These were a bunch of the blocks I have completed.  They all look awfully red to me and I know I will surround them with probably a green although I don't want it to look like a Christmas quilt so we shall see.  I am also thinking that maybe some with green, some with white and some with black.  I have done this before and thought it gave a successful look.
These were more of the same and I am amazed that there are really no duplicates or any that are just a little off from being duplicates.  That is very unusual.  The repeat was 13 inches and I cut 3 inch strips and then blocks so the finished block will be 5 1/2 inches square.

I have quite a few tops accumulated now that I will have to start quilting before too long.  I like to do all the quilting at the same time as it helps in the muscle memory with all the free motion quilting.