Showing posts with label Augusta Cole. Show all posts

Friday, March 10, 2017

Progress on the New Quilt from the August Cole Class and Egrets, Egrets, Egrets!

A blog would not be complete without the introductory sunset of the day.  This day was definitely a little different.


Here all the full sized blocks for the hexagon quilt are completed.  I haven't decided at this point whether to do the half blocks or just fill in with the lighter color I am using.


 This was testing the lighter color block and decided a definite no.


I decided on a different set from the one that August used, adding the darker blue triangles as well as the lighter color beige ones.  I had originally intended to do a pale yellow but my dyeing resulted in one that was far too bright and I didn't have enough of any of the lighter yellows.  I wasn't crazy about this beige batik so sacrificed it!!


I did the half blocks by literally doing half blocks.  It was a little tricky for the first couple of rows and I made sure I had both right and left hand sides by sewing two opposites at the same time when chaining.


I again tried the beige as the first order and didn't like it at all so found some blue that was close to the triangles, will add a thin strip of the turquoise and then this lovely batik which I had.  I knew I had to have  patterned fabric around the outside.  I think it will be about 82 x 86 when done.  Should be enough for a queen sized quilt!  Probably won't get it quilted until after GVQC quilt show though and am definitely contemplating having it long arm quilted unless I have a brainstorm soon!

The ladies nd I did some dyeing the other day.  They were working on doing batiks and I decided to just do some gradation dyeing.  This was a gradation of 7% Boysenberry with equal amounts of  Strong Orange added equally to each "pot".  I was a little unscientific this time and didn't weigh the dyes but measured so there was 1TBSP of the Boysenberry and 1 TBSP of the Strong Orange.  I figured the 1 TBSP was equivalent to about 15 grams of dye.

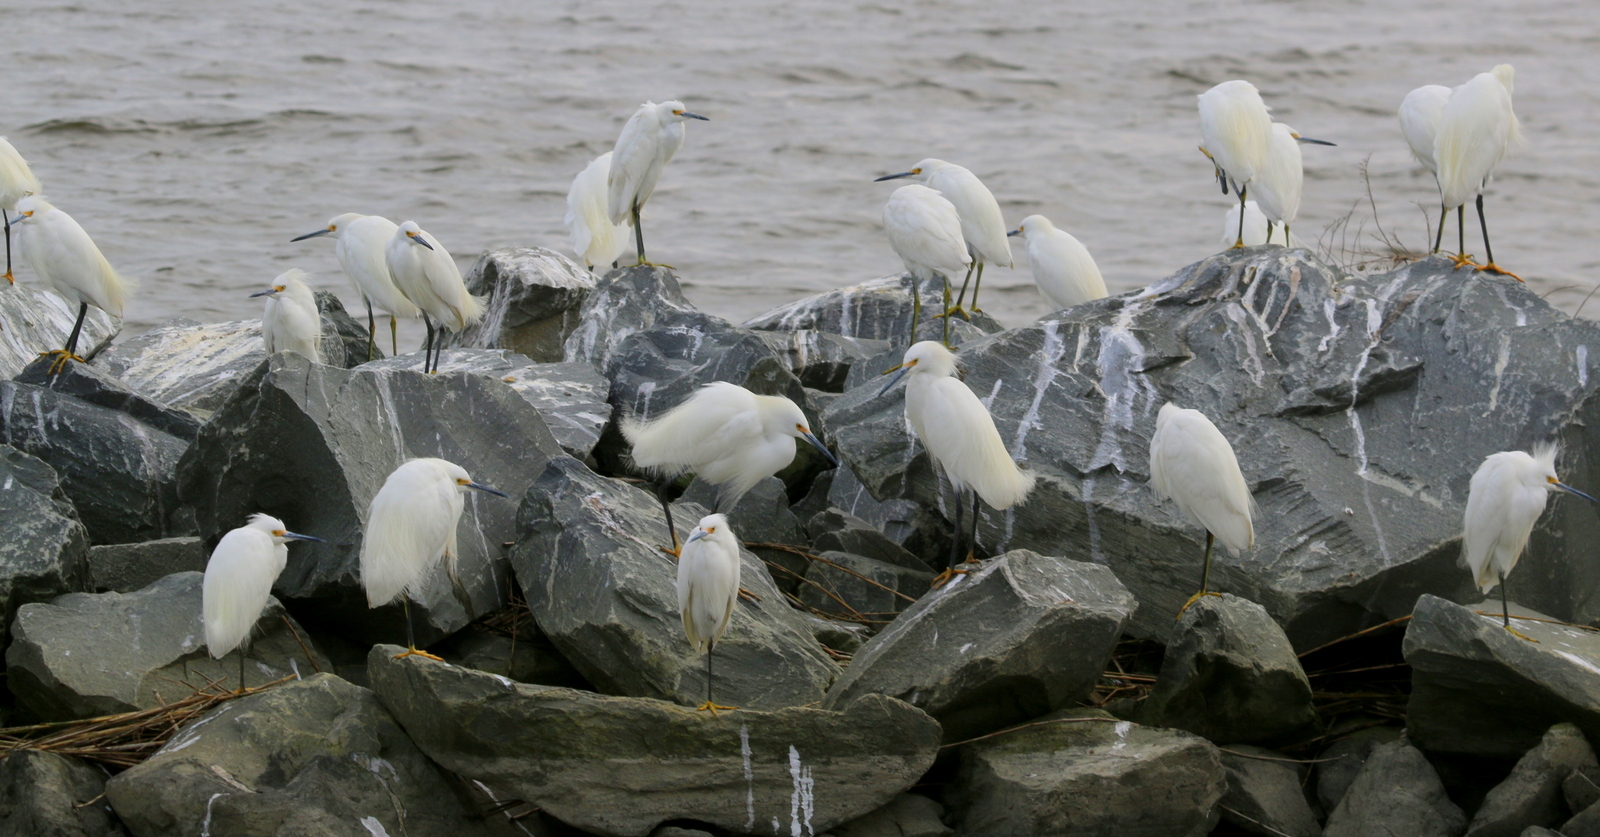
 I have seen very few birds this year but the other day I was surprised by an amazing sight.  There were between 40 and 50 Snowy Egrets crowded on the rocks next to the docks at Ft. Fisher all in their summer plummage.

 Here are just about 20 of them.  They sat there and then flew off a couple of times and then flew back gradually with even more birds constantly joining them.  I had never seen Egrets doing this!!


Here is a closeup of just one of them.


Thursday, March 2, 2017

QBTS February Meeting -- Augusta Cole - Part 1

I had so many pictures that Augusta will get her own blog post and the pictures from Show and Tell will come out another day!  This is Augusta with one of the scrappy quilts that she designs.  Most of her designs (if not all) were amazingly simple but she did some wonderful variations using color and settings that made them very unique.  I may actually try some of the patterns using half square triangles which are not my favorite for sure!!

There were so many quilts she showed, I won't even attempt to comment on many of them!

 These next three all use simple half square triangles and our patches but are arranged in different ways.  Doesn't get much simpler than that!


I loved this simple design.

This was one of her earliest quilts and a start for her love of log cabin quilts.


 These next two log cabins I just loved.  They were made using two different size strips for the light and dark areas.  The light was a half inch thinner than the dark.


The next few are more eclectic in nature showing the different uses of half square triangles which is a recurring theme.  There are others here as well.


She was a very fun speaker and a fun teacher and I certainly enjoyed the quilts as I love scrappy quilts.

Tuesday, February 28, 2017

A How-to for the Hexagon Blocks from Class with Augusta Cole

I wanted to make sure I remembered all the steps in making these blocks as I really liked them and they were a bit tricky.  This is the quilt using the hexagon log cabin blocks.  I didn't notice until later but the first row was turned the wrong way.  I was confused when I was in the class as for some reason I kept concentrating on only the top two rows.  The blocks in the top row should each have been turned so that the light was pointed down, so that there are light blocks meeting the yellow in the center.  The rest is right.  I don't know whether she mentioned this in the class or not as I am not the greatest listener!!

What is interesting is that I couldn't find any other versions of this arrangement of hexagon log cabins on Pinterest

Anyway, onward to some details.


You start with a 2 1/2 inch hexagon made by using the hexagon ruler (not going to give all the details!! as you need to take the class to figure out how to use the ruler).


Here I have attached the first three lights.  She did them one at a time but I found you didn't need to in this step before you trim to size.  (You do in the next step though.)


The 60 degree line on this ruler is between the 3 and 4 inch mark.  You place this on one of the seam lines and make sure that the hexagon measurement from the edge across is 2 1/4 inches at this point.  Then trim.  You can trim both at the same time in this step (she didn't do it this way -- she did each strip individually before attaching the next one).


All three sides are trimmed and you can see they are kind of blunt on the end.


The first row of darks is started and you do need to trim each one individually for this step.


This is the first cut in the second row.  The 60 degree line is along the bottom.  You can see that the triangle measures 1 1/4 inches with the cutting line nice and straight.


The 60 degree line is along the seam line at the top and you can see again (although hard) that the triangle right next to the dark is again 1 1/4 inches high.  You do each of the three individually -- very important for this one.


This is what it should look like after all of the first row of dark are added.  It becomes easier from here!!


Here I have added the second row of lights.  I have found it was easiest for me to put the 1 1/4 edge of the ruler over one of the dark strips and then kind of find the 60 degree line and adjust it there.  Both measurements are important and if the fudging is to be done, make the strip a little narrower or wonkier to make sure you have the 60 degree line accurate. From here on out, it is the same as that first step where you trim two sides at one time.


This is what it looks like after trimmed.  Keep adding strips three at a time ending with a dark row.


Here are the blocks I did yesterday.  I am going to use a light yellow where the three lights meet and may go with a blue where the three darks meet -- different from her set.  We shall see.  I set up my FW and have the starts of a bunch more blocks.  This was a perfect project for me as I love hexagons of all kinds, love scrap quilts and love log cabins -- bingo!