skip to main |
skip to sidebar
There was an incredible number of quilts shared at our meeting so I decided to split the pictures between two blog entries. The first entry will feature the quilts of our guest speaker -- quilt artist Eileen Williams!! To begin with, let me say that I was on the waiting list for her class which was filled. I just loved her quilts without exception!! She certainly is prolific as my friend Becky showed me pictures of many quilts that she has exhibited before. She is a transfer coastal North Carolinian like myself. She was born in the Philadelphia area like myself as well which was interesting.
This was a display of mini-quilts featuring her favored water and beach scenes -- may contain shells and embellishments and the class featured some of these techniques. The ladies loved the class and I am sorry I didn't get the opportunity to take it.
The following three pictures feature some of the work done in the class.
This was the first quilt she showed and one that she says she did specifically for a show's theme. That was the last time she worked outside her preferred area which is sea life and the beach. I liked the piece although didn't care for the coasters hanging from the bottom of it!
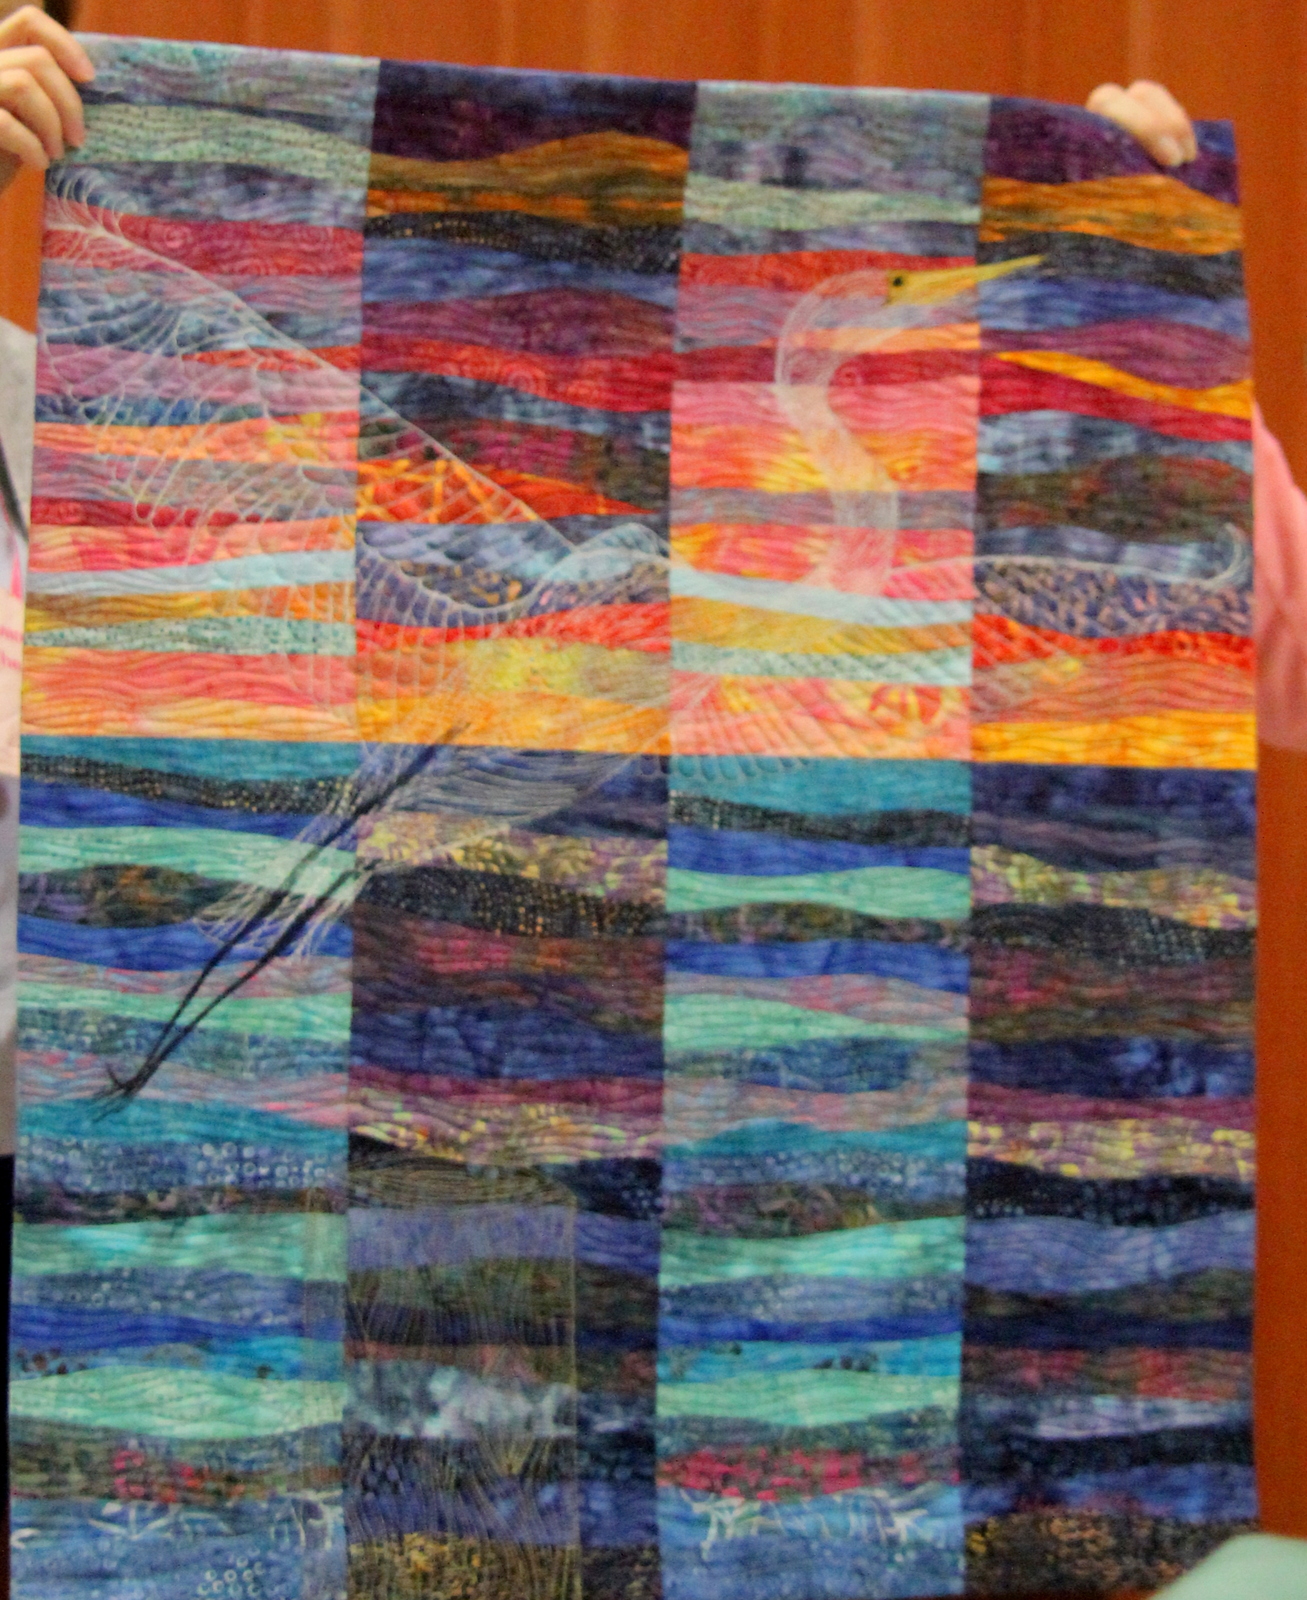
Besides the images being just gorgeous (she loves to take pictures like I do as inspiration), her quilting truly enhances the pieces as you can see here.
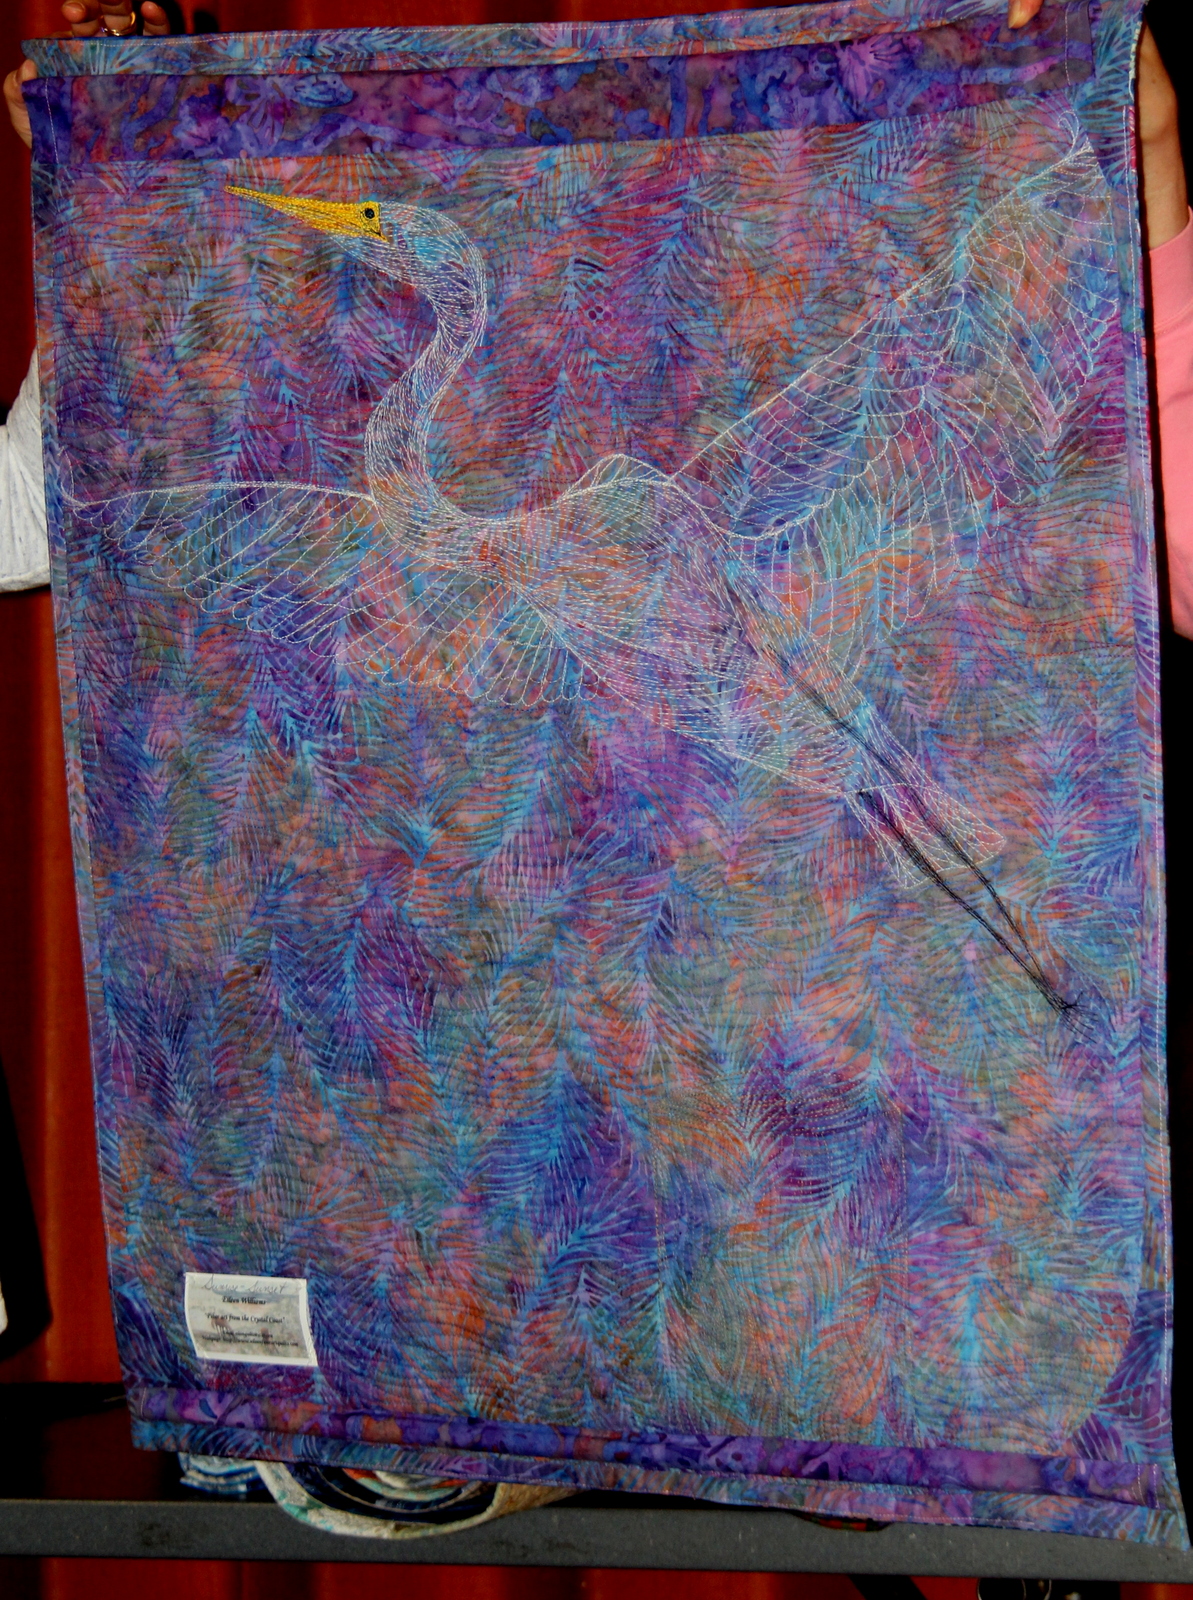
I loved this piece with the Great Egret machine embroidered in the middle!
This is the back of the previous piece showing the stitching more clearly.
This piece also has a Great Egret machine embroidered over the background.
This piece was done in a Ruth McDowell class. She feels the same deep appreciation of Ruth that I do -- she has always been one of my quilting idols and I am so glad I got to take a class from her before she retired. Of course I love the subject in this quilt as well.
Another beautiful landscape.
Here is Eileen talking about the first of her two mermaid seascapes.
Another mermaid. I suspect she didn't see any when scuba diving however!!
We all really loved this piece. She has used all sorts of embellishments in this ode to the beauty of jelly fish. Reminds me of one of the tanks at the Monterey Aquarium.
Just look at the quilting in this one. My friend Becky showed me that this was one of four in different colors, although we only saw this one.
Another lovely beach landscape -- I would assume dawn if on the East Coast.
Another beach landscape.
Featuring translucent fish whose name escapes me right now
This was developed from a picture of her son surf boarding.
You can see more of Eileen's magnificent quilts on her website which is:
,
Fiber Arts of Eileen Williams.
It was a great meeting with lots of show and tell which I will publish in Part 2 tomorrow!
Well, here are four rows together. When sewing the rows together, you pin a 4 inch section, sew a quarter inch from each end, back stitching at each end. Then I was turning the quilt over and sewing the next four inches from the other side. At this point, I decided it would save some time to at least sew each of these 4 inch seams from the same side so that is how I did the rest.
Here all the rows are finally sewn together with their filler pieces in place. It took a couple of days to get this done watching a very very annoying Netflix series (The Killing). I calculate that so far there has been about the equivalent of a 1000 page book and we still don't know "who done it"!!
Here two of the borders (the background and the aqua) attached and I have pinned up the third to make sure that the color was okay.
Finally done!! most order. The quilt now measures about 81 x 82. I will save quilting to when I get back to New York as there will be a lot of freehand.
Here is a closeup of the completed quilt showing the left hand side.
Here it shows the view from the top. My room isn't big enough to get the whole quilt in a picture with my camera. I can get it with my phone camera but no flash!
All in all I am pleased with how the quilt turned out. I would have loved to have a five or six inch outer border instead of the current 2 1/2 inches but oh well. I think the borders really enhance this quilt, especially the addition of the background fabric first border.
Next on the agenda is to make slipcovers for my dining room chairs which the new kittens will destroy if I don't get them covered. The chairs are currently sitting in a bedroom!!
We are again experiencing very cold days down here in southeastern North Carolina although luckily we missed the snow this time although there are spots with ice frozen from the rain a couple of days ago. Carolina Beach Lake has seen abundant bird life this January!! The parking lot where I usually go is closed so it has been a bit of a challenge to get some decent pictures. This morning there were more than 50 Ibis huddled together trying to keep warm.
A lovely Gadwall, the first I have seen on this lake (which is really a big pond).
A male Bufflehead dipping and diving.
The Gadwall again with a Ring-necked Duck (the first time I have seen one of these down here).
This is a Redhead which I do see fairly frequently down here.
This is a male Northern Shoveler. There were five or six of these and they spent almost 100% of their time as the next picture shows!
As my friend Becky says, Peace!!
This is a Greater Scaup which is common enough but I usually see only the Lessers down here on this pond
A couple of Ft. Fisher sunset pictures from the other night.
Liked all the color in the sky!
Horray!! All the rows are completed. No more Snails Trails to piece and then unpiece. I can't begin to tell you all the times I had to undo blocks after I had already set them in a row. Also, there is no seam longer than 4 inches in this quilt and you have to backstitch at the beginning and end of each addition.
I am in the process of beginning the auditioning of borders even though I still have considerable stitching to do before I get there. I am trying to find something that kind of blends in with all the lights and I think this piece is it and it looks like I have enough of it (on the left hand side). I will put this 2 inch border around the whole quilt as I want to soothe down all the motion in this quilt.
I think I am then going to add a 3/4 inch to one inch border using the turquoise that is in the middle of each Snails Trail block. A darker purple or blue border will complete it. Nothing fancy for borders as the quilt is making too much noise as it is and I want people to be able to sleep under it without nightmares!
I have begun sewing the rows together and putting on the edge pieces. Almost as tedious as making all those Snails Trails as you have to turn the quilt one side to the other every four inches and sew a little seam.
A visiting Mute Swan at Carolina Beach Lake - a juvenile I am sure and not a frequent visitor on this pond.
This is a Greater Scaup which is also not a frequent visitor -- used to see a lot of the Lesser ones. There were two pairs today.
A couple of Hooded Mergansers which I don't usually see at the lake as well.
For some reason, we are seeing Kildeers all over in many places you don't normally see them including my backyard during the snow!
There was a huge influx of Robins right after the big storm.
I am making significant progress on this quilt. I only have to do about 25 more of the Snails Trails blocks to get that part done. I am also starting to finish the whole rows but haven't sewn the rows together yet.
Only one more of the long full rows and a few blocks to finish out one of the smaller rows.d
I have decided to finish the quilt differently than she did and it will be easier than I anticipated. I am doing a background colored hexagon half instead of the darker fabric, then adding a rectangular 2 inch background piece and half triangles on the main motif. A small square in the corner finishes it off. This way I don't cut into any of the Snail's Trails blocks.
She finishes hers off by cutting those top motifs and having half hexagon motifs. The quilt looks incredibly busy on my wall and adding more background seems to be more soothing to me so I will be also adding an additional 2 inch wide background piece around the whole outside.
Here is some auditioning of the above idea of a border on my design wall. I will probably add an additional border of thing turquoise and then a darker blue or purple. Things aren't sewn together. I am also going to change out that top Snails Trail on the middle motif -- just aesthetics -- will just invert the row as I haven't sewn it to the one on the left and I will be more careful in the placement of some of the darker lights and darker darks.
If I were ever crazy enough to do this again, I would also make half Snail Trails on those outside blocks -- i.e, only put the dark on one side rather than spiraling out in two directions from the middle.
Of course, you can clearly see the difference between her quilt above and mine in the direction of the spirals.
We did not escape the bad east coast weather this time!! We have been wintering down here in southern coastal North Carolina for nine years and this is a first for us. Lots of ice still and it has been sunny all day but the temps are barely above freezing even now in the mid-afternoon. They have been going into the teens at night and will for the rest of the week. We have had a few really cold days before but not for two weeks running at this early in the season!! All this ice is of course covered with snow on the streets in the land of no snow plows or even salt trucks!!
Doesn't seem right to have palm trees covered in ice and snow!!
This has given me lots of opportunity to work on the "quilt from hell" that I am determined to finish. The sad part is that I have ideas of how to do different ones but no way would I have the patience to ever do this quilt again. Usually I can finish a quilt top in a week or two, even fairly complex ones. At the rate I am going on this one, it will be over a month at least just to get it pieced. So it will only be done once. This is a single motif sewn together. It was a lot easier to put together than I thought it would be, just tedious but perfect for doing on my Featherweight.
Hint: Do all your sewing from the Snail Trail side so that you can match those corners. It is okay if you cut a little of the corner off but not good if you make the seam to slim. This also goes for when you are attaching each set of triangles while making the Snail Trail block.
One whole row is complete here. Here are my hints for putting it together to this stage:
I decided to take my first shot at putting one of the motifs together as I had dreaded this step. I think alternating the different parts of putting this quilt together makes it easier going as even with the different fabrics, all the trimming gets a bit tedious -- the reason I don't like making quilts with half square triangles. So here was my approach as there were few if any hints in the pattern just a couple of pictures!
1. Sew all the hexagons together first sewing two triangles and then adding the third. Press away from the middle triangle. Sew two sections together to form a hexagon. Sew to the end -- don't leave any 1/4 inch allowance. Press the middle seam open and press the hexagon.
2. Put the motif (a hexagon center with the surrounding pieces) on your design wall to make sure all are facing in the right direction. Carefully take off the Snails Trail blocks with the triangle next to it making sure triangle in same place on each block. Take to the machine and make a light mark a 1/4 inch in on each end of the square and then sew each triangle to the Snail's Trail block starting a quarter inch in (and backstitching) and going to within 1/4 inch at the end. Do this for all the blocks for a whole motif (one whole motif per row). This will be six Snails Trail blocks for a whole hexagon. Finger press toward the triangle.
3. Here comes the tricky part. I thought this would be more difficult than it was. I first pinned a Snail Trail block with its attached triangle to one of the triangles in the hexagon. I pinned at either end from seam to seam making sure I didn't catch any of the previous seam. I then stitched this from one end to the other. I then did the same thing with a second Snail Trail block right next to this first block doing the same thing. then I sewed the seam between the two blocks, again making sure not to catch any of the previous seams while sewing, backstitching at the beginning and end of each seam. This was laborious but not difficult as it turns out if the blocks and hexagons are all the right size!! I then pressed it pressing the hexagon seams out.
The tedious part of all this is constant checking to make sure the arms of the Snail's Trail blocks are all going in the proper direction. I learned this the hard way!!
Well, I did have to spend one whole day of sewing undoing three of the four blocks that I had sewn together in the above picture. Funny how seeing the lined up showed up the errors easily!! Can you find the "bad" blocks. It was a pain to take them apart because of the backstitching but was easy to reassemble because of the no overlap of seams.
Here you can see the second full row (not sewn together yet) and the intermediate row. There are four of the big rows and three of the intermediate ones. I am going to finish off the intermediate rows and the tops and bottoms of the big rows differently than she does. It will be a little awkward looking but I do not want to lop off any of the Snail Trail's blocks. I think it will provide somewhat of a tan border beginning as well. I am going to add even more tan in the border I believe as I think it needs to be calmed down a bit. We shall see!!
Before I make any more blocks, it is back to cutting which took days before. I am completely out of the lighter values in all sizes!




 Posts


