Saturday, March 26, 2016

Visits etc.

I haven't posted in awhile because I have been doing a bit of entertaining!!  Several years ago, I reconnected with my best friend from high school whom I had lost for about 40 years!  Since then we have gotten together at least once a year if not more.  She lives in Florida but comes up once a year to North Carolina for a bridge tournament put on by the local bridge club.  She took up bridge about five years ago because of another high school friend's encouragement  -- she is an extremely good bridge player!!  The first year she came up for the tournament, she came only with her partner for bridge.  The following year she brought up two additional ladies and insisted that I be her partner.  This was rather daunting as I hadn't played bridge in almost fifty years and things have changed considerably in the bidding.  This was my third year of playing in the tournament with her and even though I only play once a year, we consistently score master points (which don't count for me as I don't belong to the bridge league).  I actually feel like a bridge player again!!  This past week she came again with two friends, for one it is her third visit and the other her second.  We had a grand time, playing cards and visiting the Wilmington sights!!  This is a view from a boat ride we took one day when the temps were in the 80s! We ate at this wonderful little restaurant called George right on the Cape Fear River -- it is the building with the white awnings.  The food is generous and really good!!

This was one of the petroleum storage facilities at the Port on the Cape Fear River.  They paid a lot of money to have this painted and it would be great if they were all painted!!

Jean and Vicki decided to go for a walk along the beach one evening after dinner.

This is the four of us after a victorious bridge session.  We came in first as a team winning all our rounds.  I am the second from the left.  

The Azalea Festival (one of the big yearly festivals) isn't scheduled until  next week.  The weather has been so warm, though, that there will be few azaleas left to bloom.  They were glorious when we were touring around last week!

There has been constant bulldozer noise at night as they are renourishing the beaches down here.  These pipes are strung for at least a mile along the beach with a ship pumping sand from the ocean up onto the beach.

This is one of the bulldozers and the end of the pipe from which sand is spewing forth!!  It is quite a process and it has been done about every two or three years since we have been down here.  The sand gets pulled out and shoals created and then man comes in, breaks down those shoals and pumps the sand back to the beach.

I visited the deer down at the Air Force Recreation area.  They have closed off the road that I usually go down so I had to look at them from a distance (about a herd of ten).  I then decided to turn around and all of a sudden they came running up the field to greet me -- I thought I was going to be surrounded!!  They are obviously used to someone feeding them from a car!!  I still haven't seen the big buck though.  In another few months when I will be gone, I am sure there will be lots of fawns.  Hopefully some will still have their spots when I come down in the fall.

I am back to sewing, finishing up a couple of blouses for my daughter and then sewing more purses.  Had to buy more fusible fleece as I actually finished off a bolt!

Friday, March 11, 2016

Enough Cosmetic Bags -- Time for Some More Purses!

Can you believe I made 55 of those cosmetic bags and actually made a dent in the zippers and marbled fabric stash?  If I get my act together, maybe I can sell some at our quilt show.  Need to figure out how to label them though.

Anyway, decided to switch to purses again as I really needed to try to see if I could figure out a solution to the "top sagging" problem.  I like to put zippered pockets in the lining of the purses and this has caused the top to sag down which is annoying.  I know I could do a line of stitching above the pocket sewing the outside to the lining, but this would be awkward and show.  My new solution which will hopefully work is to not let the bottom of the inside pocket be free to sag down when full.  I have sewn a line of stitching at the bottom of the pocket attaching it firmly to the lining.  I will have to use the purse to see how this works.  You can see I am using more of my nice marbled fabrics.

Here is the beginning of the next purse using commercial fabric this time. I brought down much of my half and quarter yard stash down with me.  I love using the pseudo suede in the purses as it really holds up extremely well.  I can get it cheaply down here and it must have repellent on it as it still looks like new in a lighter color on a purse I have been using for months.  I am going to head to the shop where I purchased it and get some in every color they have!!

The birds all seem to be pairing up as well!  Spring must have arrived. The Laughing Gulls are all laughing and showing their summer colors already. Here are the beautiful mallards.

Buffleheads.

Lesser Scaups.

Hooded Mergansers (which were not in their usual place).  

The weather has been gorgeous down here with temps  in the high 70s so much time has been spent outside these past few days but must get my act in order as guests arrive on Monday -- a full house!


Thursday, March 3, 2016

Making the Cosmetic Bags!

Each bag requires:

7 inch zipper
2 pieces of fabric (main outside) 5 1/2 inches by 9 inches (in a perfect world, you could              make 4 outsides from one fat quarter)
2 pieces of lining fabric 5 1/2 x 9 inches
2 pieces of fusible fleece 5 1/2 x 9 inches
1 piece main fabric 2 1/2 inches x 3 inches


Enclosing the Zipper:


  1. Cut the 3 x 2 1/2 inch piece  into 2  1 1/4 x 1 1/2 pieces.
  2. Wrap one of the pieces, right side against the zipper around to the back of the zipper overlapping the two sides.  This should be about 1/2 from the ends of the zipper.
  3. Sew the tube down right next to this and then trim the bottom of the zipper.  Do this slowly just in case you judge where the bottom of the zipper is. Trim away the excess zipper.


  1. Pull the zipper through so it looks like the zipper is closed by fabric at the bottom.

  1. Repeat for the top of the zipper.  I would suggest opening the zipper up a bit.
Making the bag sandwich:

  1. Unzip the zipper halfway.
  2. Take one of the fused main pieces and center the enclosed zipper underneath it centering it on the right side of the fabric (wrong side of fabric will be facing you). Hold it stable with a couple of pins.
  3. Take one of the iining sections and place underneath the zipper with the right side facing you.  Pin the three sections together.
  4. Sew using a regular presser foot and sewing just a presser foot width from the side of the fabric (I would guess that is between 1/8 and 1/4 inch).  This keeps the stitches about 1/8 from the zipper teeth.  When you get about an inch from the zipper pull, lift the presser foot, and move the zipper to the part already stitched.  Continue stitching until the end.  This will give you a nice even seam.


  1. When you have finished the above, do the same on the other side of the zipper.  
  2. When this step complete,  you will have a zipper in the middle, the lining fabrics below and the main fabrics on top.


Completing the bag:

  1. Trim the excess from the sides of the zipper so that it lays in line with the outside and linings.
  2. Make sure zipper is all the way open (very important).
  3. Put the right sides together of the outside fabrics and pin.  Do the same with the lining fabrics.  Make sure they are even where they meet at the zipper.  At the junction of the zipper, push the seams toward the iining and make sure that the zipper facing is pinched in half.  Do for both sides.
  4. Start sewing about an inch from the sides of the bottom of the lining and sew all the way around until you are about 4 inches from where you started on the lining.  Backstitch and end.

  1. Trim the seams neatly and cut across at the corners (to reduce the bulk).
  2. Turn the bag by pulling the outside through the lining.  Use a knitting needle or large scissors to make the corners square and to push the junction of the zipper and the bag so it sits nicely.
  3. Either hand stitch or machine stitch the bottom of the lining so that nothing can slip through.
  4. Give it a little press!  Sometimes I press it along the way when I have finished making the bag sandwich.

Its a little darker on one side because I managed to squirt water on it when ironing but it is done!

This is what it looks like looking down on it.  I could have sewed a little closer to the bottom of the zipper but you can see how the little piece of fabric makes it look a lot more finished on top.


Wednesday, March 2, 2016

A Use for My Marbled Fabric!

I love to do fabric marbling but have really been in a quandary about what to do with the fabrics once I have made them.  For the most part the fabrics are somewhere between a fat quarter and a fat half yard of fabric.  I tend to use a lot of color when marbling and can actually get two prints many times -- one dark and one a nice light print.

This is a long long ago example (and not the best one) of a second pull -- hard to go through all those files to find one of the better ones.

The first picture is of my design wall with the 30 or so "cosmetic bags" that I made this week while binge watching the very old BBC Jane Austen series -- acting terrible but keeps closely to the original books.


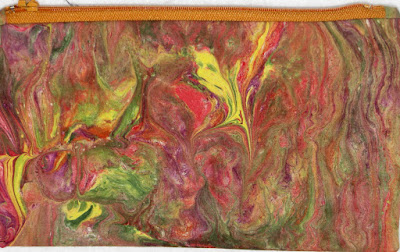
This is a closeup of one of my favorites.  Each bag is lined and is approximately 8 inches wide and 5 inches in height.  They all have fusible fleece giving them some oomph.

I have wanted to do something with the marbled fabrics besides using it in clothing (which I have done successfully).  They get lost in a quilt although some pieces could easily be almost stand alone.  It is a very serendipitous process (doing the marbling) and you really don't know what you will get many times.  I have been collecting quilt patterns that feature nice fabric but somehow it just didn't feel right.  I have dutifully brought these pieces down with me (about a third of my stash of marbled fabrics) hoping I would find inspiration.  A friend used some of these fabrics to make lovely notebook holders which she gifted to my school group of online friends.  It was a great use of the fabric.  

Here are three more closeups.  They are fairly easy to make.  I will put together a post on that as well for later!


I have a ton of 7 inch zippers that I bought years ago when making a lot of my own clothes.  Even back then I didn't use 7 inch zippers so not sure why I have so many (I used 9 inch zippers for skirts).  I have ordered a bunch of zipper pulls onto which you could add some sort of adornment.  Once I get these, I will see what seems right.  I have used thin ribbon in the past on the zipper pulls and that works well.  We shall see!