skip to main |
skip to sidebar
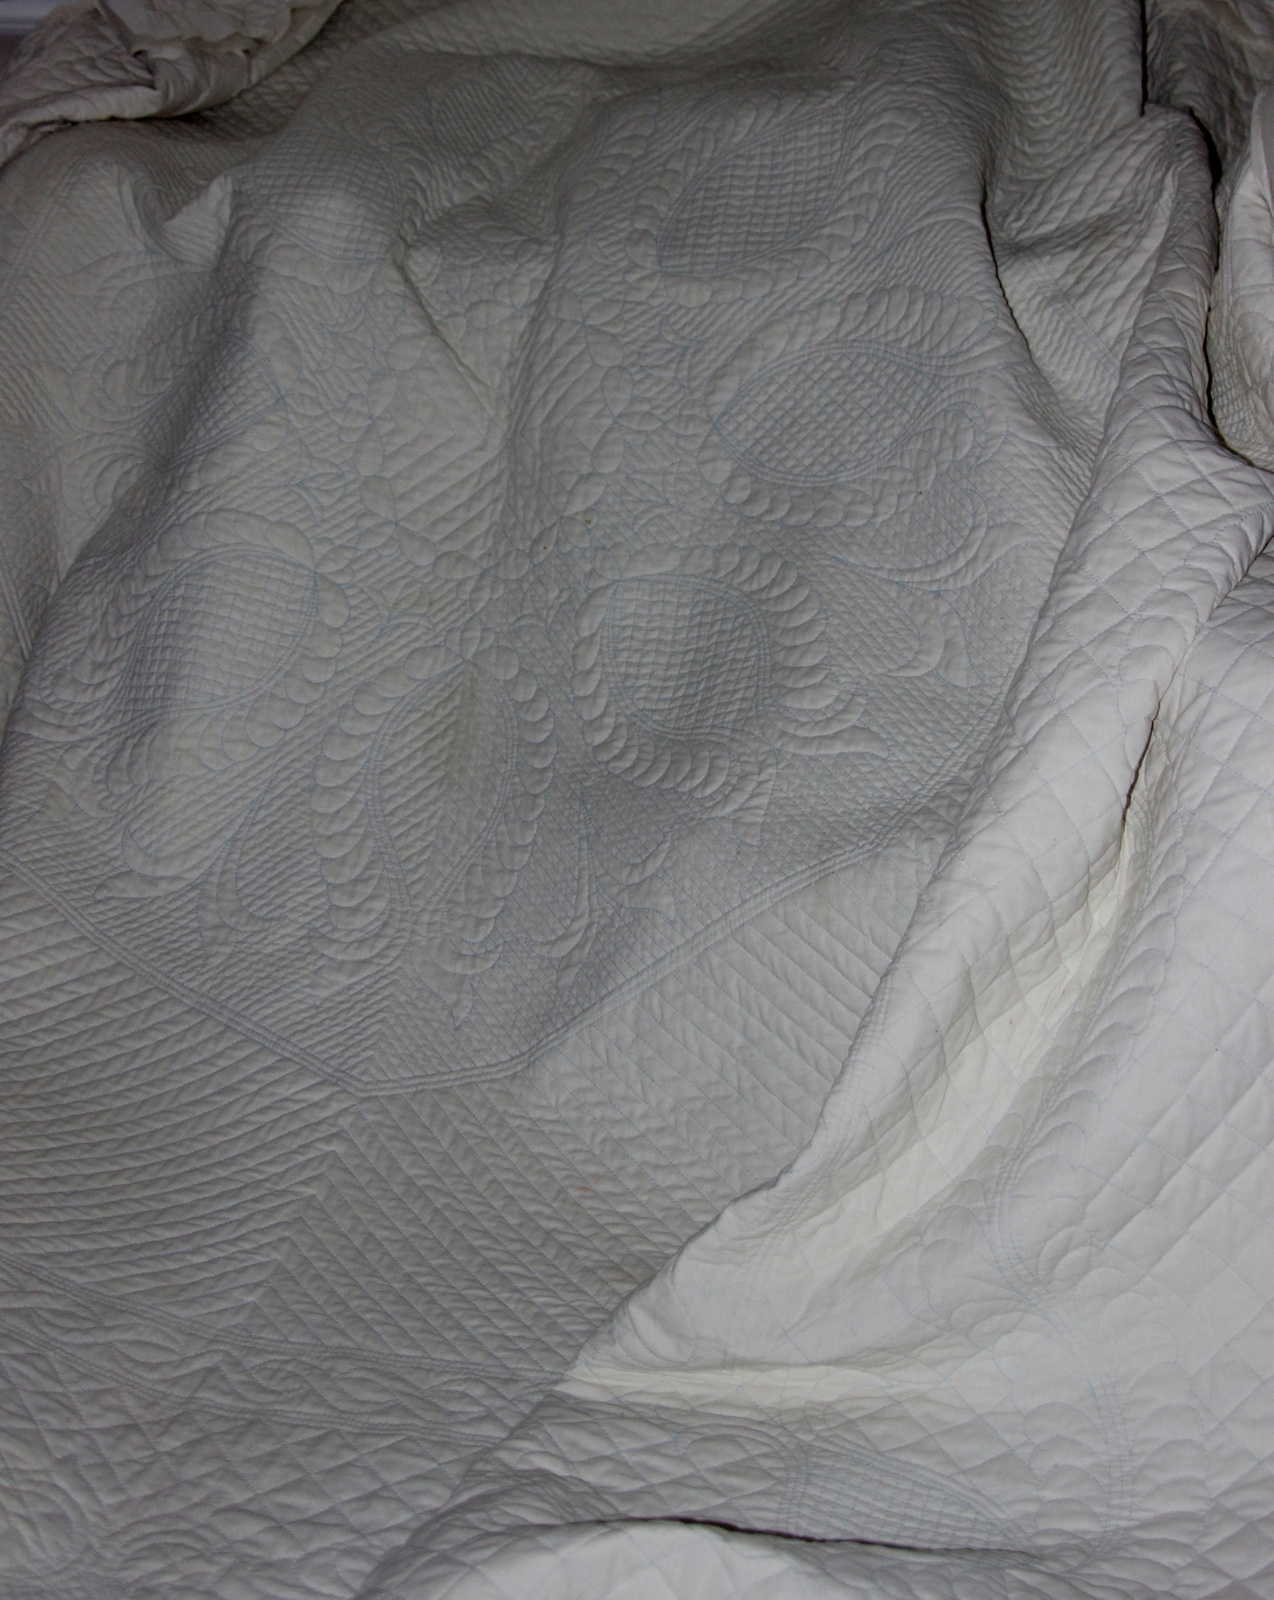
I tried but it is impossible to photograph this quilt but this was my best effort. Surprisingly, my phone did a better job than my expensive slr! The slr objects to something that is all one color. It is a queen sized quilt and is now on my guest room bed down here at the beach. It took four winters of hand quilting to get this done I am a compulsive finisher and this printed top for probably 15 to 20 years! I like to have a hand project when I am down here -- my husband claims my hands must always be moving. I finished a Baltimore Album the years before I started quilting this one!
Don't know whether you can see the quilting any clearer in this picture.
Also making sustantial progress on this black and white quilt. I made 72 blocks in about 3 hours today but it will take about 240 to make the quilt. Another 70 or so and I will have a good sized quilt! I don't think borders would look good on this one!
Dianne, Becky and I got together for a day of marbling. Becky brought both paper and fabric with her to "play" with. The middle piece on the drying rack is on paper and the other two pieces are fabric. Becky attempted with the top piece to copy the colors of the bottom piece. With marbling this is difficult after the size (the liquid on which you marble) gets filled with paint. You never know what will happen at that point.
The marbling process starts with soaking your fabric in a solution of a gallon of water and somewhere between 4 tbsps and a cup of powdered alum. Dharma even has you use more alum. Pro Chem has published two different measures which was the first set above. A day before you want to marble you need to make up the size. I have used Methycel (methycellulose). The proportions are 3 1/2 tbsps per gallon of water with a tbsp of clear ammonia (MUST be clear). You add the Methylcel very slowly to the water, stirring continuously for about 5 minutes and then intermittently for the next half hour. You need to keep your paints and the size the same temp so I store them in the same place for that day.
Next on the day you start, you have to make up your paints in small containers (Becky supplied the plastic containers from yogurt which were perfect). You mix up about equal amounts of liquid acrylics with water and stir. Drop to see if they expand on the size. Do this with all your paints. I add GAC900 to each of the paints as well -- this is especially for use of acrylics on fabrics and is from Golden paints. If they refuse to expand, you can add a drop of Synthrapol -- no more as too much will eventually ruin your size. Once you get everything set up, the fun begins. You need to tear up some newspapers (tear from top to bottom as newspaper does have a grain). This will be used to remove bubbles and any remaining paint from your size between pieces. You use eye droppers or whisks made from whisk brooms to drop the paints onto the size.

I did a total of ten pieces and some are better than others for sure. The size got a bit corrupted with too much Sythrapol at some point and so it was more and more difficult to get good crisp prints like this one.
Another of the early prints.
This is probably my favorite technique for some reason. I drop all the paints and then take a flat piece of cardboard or in this instance a tongue depressor and scrape across the top of the size stretching out the colors. Then I drop a very contrasting color on top. I use a lot of paints when I marble.
This is another using the above technique but after the size had been corrupted so very pastel but I did like it alot!
This is a second print made from the same dropping of colors. The ladies referred to this as a "ghost" print. I like it much better than the original which I gifted to Dianne as she liked it better than I did so there is no picture!
This is one of two pieces that utilized previously dyed fabric. This was a shockingly bright yellow piece. As the paints are transparent (although I had quite a few opaques yesterday), the color of the under piece shows through. I used nothing but different shades of blue on this one.
I had several more but the photos were blurry (like this one) so I am not posting them! They were not my favorites either.
Over all, to me it was a very successful day of marbling. I very rarely like all the pieces I do!! Each of these pieces is about 17 x 21 inches. I use an old photo developing tray that someone gave me and wrap it in a plastic bag so that it doesn't get too colored.
I haven't finished any more blocks on this quilt since leaving my sister's as I had guests as soon as I returned, played bridge for days including a three day tournament and then had another set of visitors arrive about three hours after the previous ones left!!
I have quite few more blocks for this one done as well. I will get back to these as soon as I finish binding my Sweet Charity commitments!
It is very hard to see but I finally (after four winters) completed the hand quilting on this queen sized wholecloth quilt!!!! Working on sewing on the binding now and then into the washer and onto a bed!
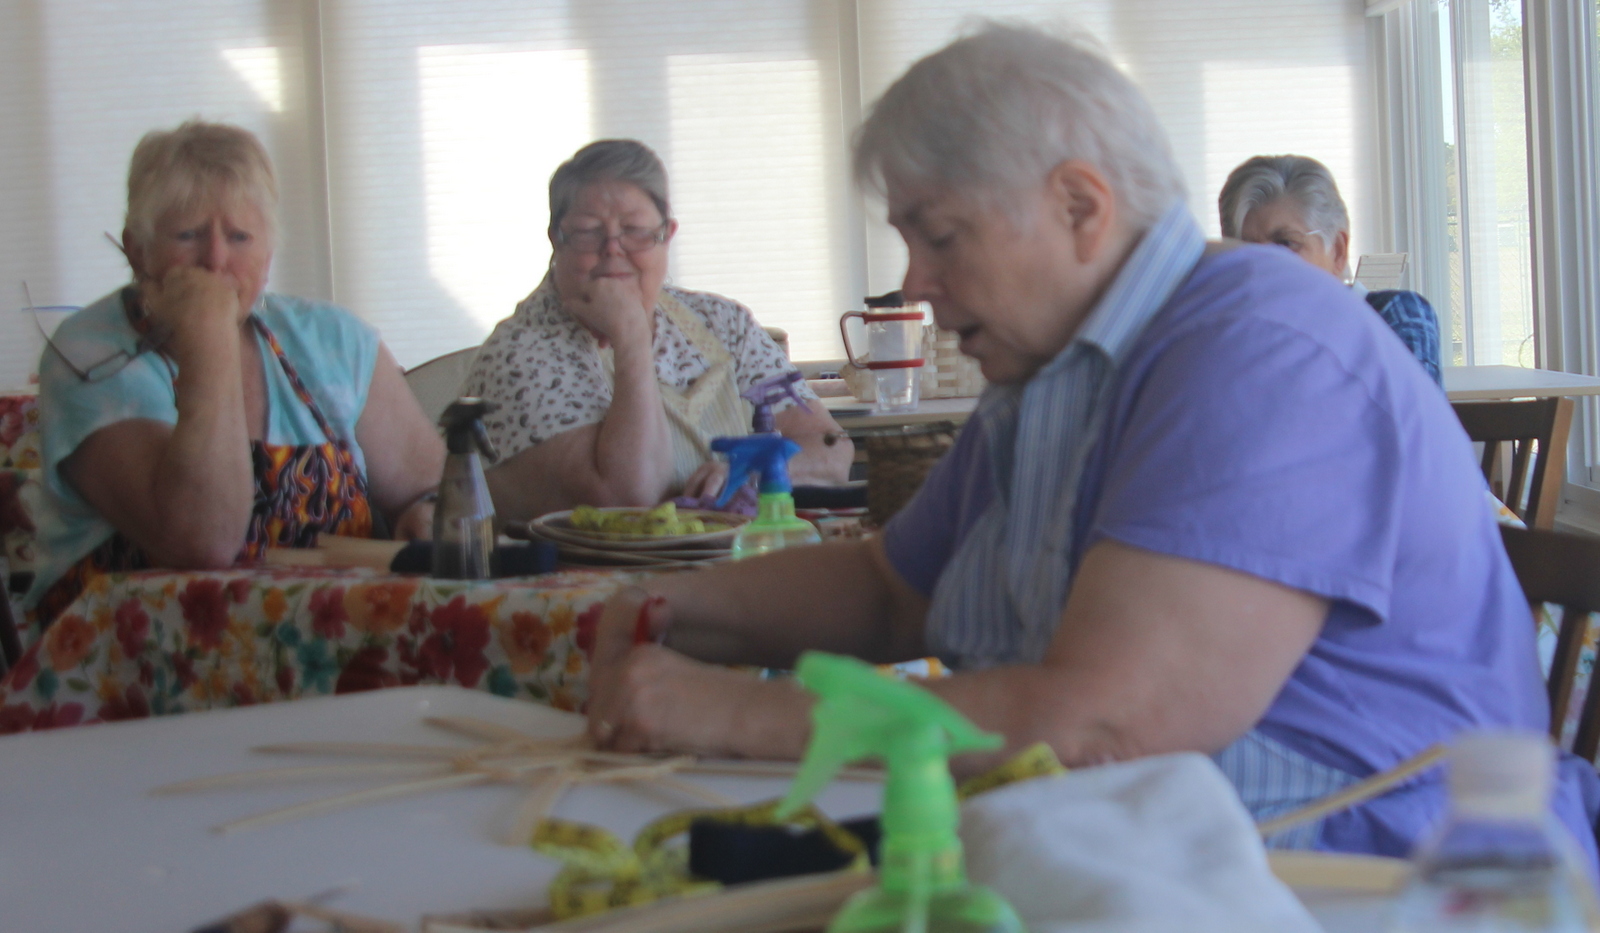
We met again at Coastal Sewing to make charity quilts using the disappearing nine-patch design. This was one Miranda had already completed.
I believe Miranda also did this one which is baby quilt sized.
This is the one Dianne made to show us how they looked. The fabrics for this one were donated by friend Becky. Dianne uses a consistent fabric in the centers of the nine-patches while Miranda's were random. Both are successful. Dianne uses a totally different technique altogether. She doesn't make the nine patches but sews long 5 inch strips and 2 1/2 inch strips sewn together and then cut into a five inch width and a 2 1/2 inch width. She contends this is faster and it just might be!! I didn't do the nine-patches as quickly as I usually do as I didn't have the solid center squares. Usually I do the three rows and then sew the three rows together where they are attached as I chain pieced the three rows. Then I just stitch up the columns. We would really need to test Dianne's theory scientifically!! My friend who was visiting accompanied me and acted as a "sous-quilter", cutting and ironing so I could just sit at the machine.

This was the piece that Nancy and her "team" finished during the two hours we were there. I only got as far as having the individual patches cut and ready to sew back together.
This is the piece that Janice (my sous quilter) and I did. I was convinced while working on it that it would be the ugliest quilt ever made but I am relatively happy with the scrappiness. It just needs a blue binding now to pull it all together!
Looking out from the lenai at the sunset my first night there. Lots of color!
I started two quilts while at Gail's using my large collection of black and white fabrics. I was determined to use lots of these while down at the beach this winter. Each year, I try to select some project to do that I just don't do while back in Rochester. I have been collecting black and white fabrics for years. I was pleased to note, however, that I had quite a selection of fat quarters which were super useful for these two projects. The first is one I saw on Judy Simmon's blog and the second was from a workshop we had at GVQC years ago. I didn't do the project during that time as I didn't have time to prepare. I am very happy with their progress. They are both super easy and quick.
This one uses partial seams and I drafted it using EQ8 which I finally installed on my computer after buying it several months ago!
This is the incredibly complex lion that my sister is working on. More power to her!!
On Friday, we had a class on basket weaving. I wasn't sure whether I would enjoy this or not but figured what the heck and would support my sister as she was having the teacher in her home. This was the very beginning of the bottom of the basket which was for me the very trickiest part and I had to be shown several times just how to do this!!
This was our instructor Katy working on that bottom part.
You work with everything wet and here we wrapped the spokes up so they would start to turn upwards and we could start weaving the sides.
Here the sides are pretty much woven as high as we were to go,
Gail is weaving the sides on her basket.
After the sides were all woven, we just had to finish it off and add the handle. This was accomplished by adding a couple of pieces of wide rattan on the inside and outside of the basket with sea grass on top to hide the edge where we had tucked those spokes back on themselves in the basket. We then wove around that edging and finished it off The teacher added the handles on all our baskets before that last step Gail is holding up her finished basket.
This is my finished basket which now contains paper napkins on my dining room table.
And here we are with all our baskets and you can see there is quite a bit of variation in the size and shape!! with March overachieving the most (on the far right with the largest basket!
And by the way, I really had fun in the class!! Don't think I would know where to get the materials on my own though! Would do a larger version of this basket in a heart beat It is a nice size and very sturdy once dry!
This and the next two pictures are of a male Baltimore Oriole at my sister's feeders.
His orange is beautiful against the bright blue sky.
I liked this view from the back as he got some suet.
This was the first Goldfinch of the season just beginning to morph into his breeding plummage.
This is his kinda lookalike the Pine Warbler, of which there were many!
This is a very far away Red-tailed hawk which I saw first thing on my first day at Gail's home in Ocala.
A Downy Woodpecker who was hanging around quite a bit.
This is one of may Red-bellied Woodpeckers. This one had some strange markings -- the red over the beak, then the white and then more red on the head.
A break from the birds to show the Sherman Fox Squirrel, aka the Monkey Squirrel. This appears to be a female to me. They are an endangered species but do frequent Gail's feeders.
Another view of the Fox Squirrel so you can see her tail.
They also have this strange gray squirrel that they have nicknamed Q-tip for obvious reasons!
There were several very photogenic Blue Jays, some bluer than others!
So pretty against the trees and sky!
Mr. Cardinal!
Mrs. Cardinal.
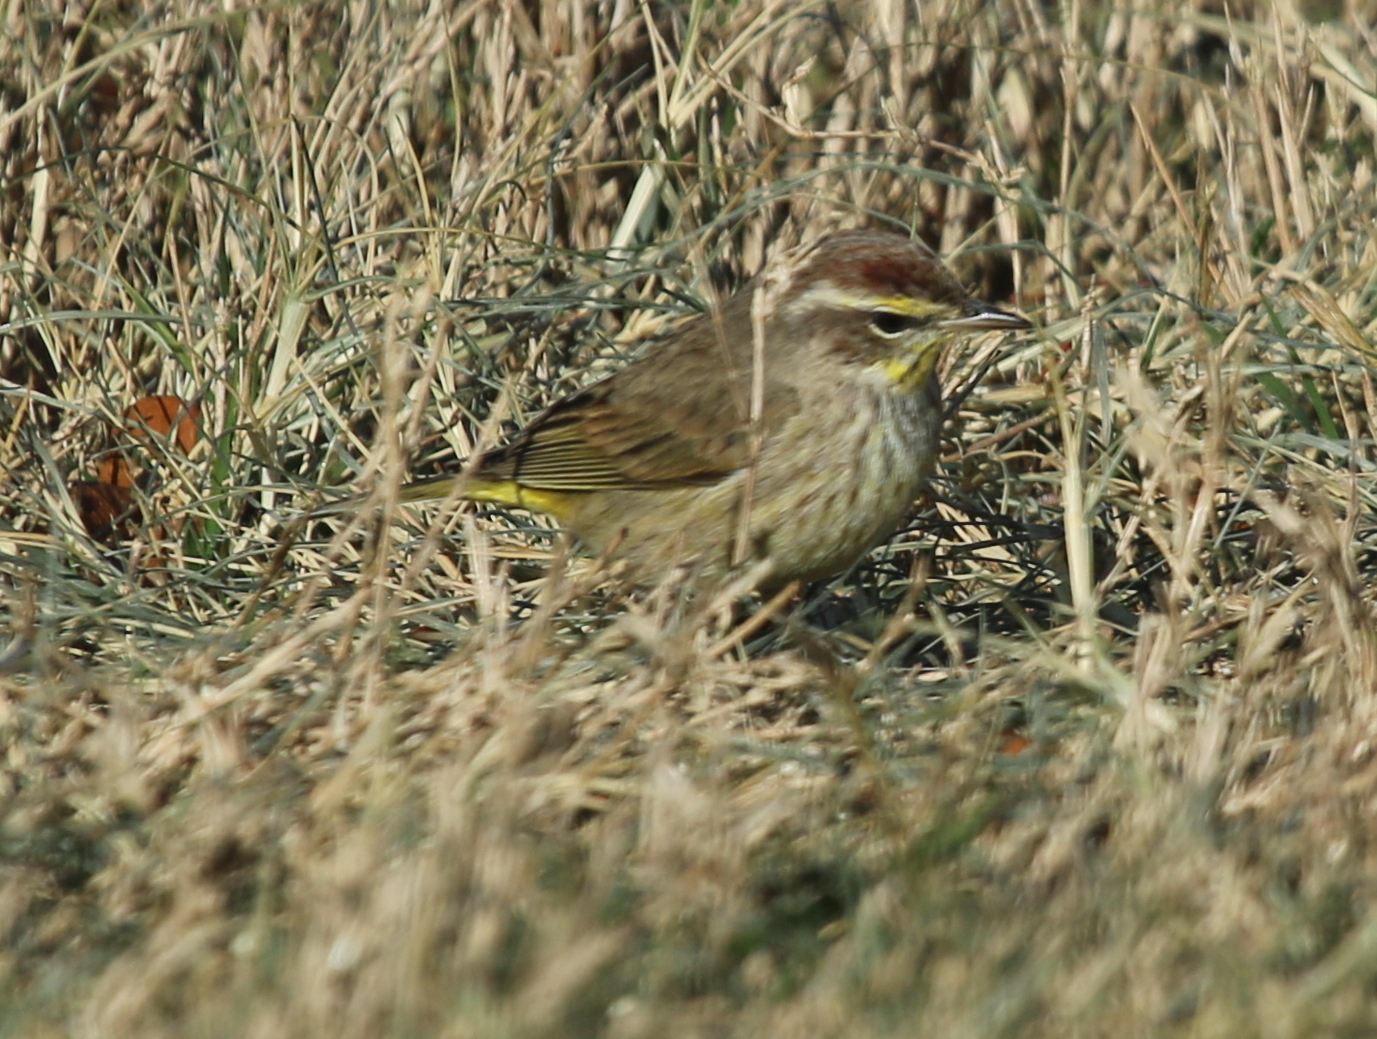
Palm Warbler with the yellow under the tail.
Yellow Rumped Warbler who has yellow on top of his tail! We see tons of these down in Kure Beach.
House Finch. Their color is determined in a large part by the things they eat like the Cedar Waxwings whose red is sometimes yellow or orange.
Last but not least is a Tufted Titmouse who wouldn't pose for me -- they move fast!