Wednesday, February 16, 2022

QBTS February Meeting

It was great to get together for an in-person meeting this month and a lovely program by our own Mari de Moya.  This spectacular quilt was done by Betty Van S!


Loved the colors in this quilt.


This was a crazy quilt which was supposedly done in 1948 and some of the blocks were dated as such  The fabrics were all much older and I suspect this was an update on some "found" blocks  My mother and grandmother did this with some blocks found in a barn in Massachusetts (although they were cotton and I suspect much older)

A Habitat for Humanity quilt.  This is the block I use in making these quilts as well.

Another Habitat quiit!


Again, really liked the colors and am certainly a sucker for anything purple!


This quilt was part of an exhibit at the Cameron Art Museum here in Wilmington as part of an exhibit featuring local pieces of art.  It was a reminder that another show is coming up starting in April.


Liked this one!


This guild participates in a lot of charitable quilt causes and this was a Quilt of Valor to be donated.

This was a quilt done by our speaker and it followed a spectacular applique quilt which I was sure would be hard to be matched but I think she did!!  Beautiful quilt!!


This is a closeup of the center of the quilt.


And this is the quilter (and our speaker), Mari!


This was an embroidered quilt maybe from the 50's?  Lots of signatures on this one and all using the same pattern.


This is a closeup showing the signatures.


This and the next picture were the top and bottom of an absolutely exquisite applique quiit.  Not only was the applique beautiful but the machine quilting was exceptional (done by another member of the guild).  


A closeup of the stitching.


Wednesday, February 2, 2022

Delectable Mountains -- Using Up My Reject and Scrap Fabric!

I thought I would provide a pictorial set of directions for one of my favorite blocks -- Delectable Mountains.  It looks so complex but is very easy as long as you take it slow at first.

The first step is to cut 2 squares of fabric -- one with a lighter value and one with a darker.  Mark a centerline on the diagonal and stick in a couple of pins to keep it stable.


After you have sewn a 1/4 inch from that centerline on either side, cut on the marked line creating two identical half square triangles.  If your squares were 10 inches, these half square triangles will each  measure 9 1/2 inches square. Open and press the seams to the dark side.


I always check to make sure all is nice and square.  Use the ruler like this for the easiest way to square it up.  My squares were 8 1/2 inches at this point.


This is the orientation of the two blocks before you stack them for the final cutting.  Stack them tightly one on the top of the other making sure they are nice and even.


After you have stacked as above, your first cut will be a vertical cut halfway across.  In my case with an 8 1/2 inch block, the cut was at the 4 1/4 point. 

I then stack them again and make another cut halfway across again.  In my case this was at the 2 1/8 mark.  This is how they look when you just unstack them and lay them out.  You then reorder them.


They are reordered here.  I then stack them up and very carefully sew them together.  Even being careful, I guarantee you will sew some together wrong!  I know.  I keep them as separate blocks (left and right sides separate) until I decide on the set.  There are lots of options.

There is a story about the beginnings of this quilt!!  I had three packs of Hoffman batiks that I have held onto and admired for a few years -- a gift from my sister.  Each had 40 10 in squares so I decided I would make two quilts from these that I would keep -- one would be Delectable Mountains.  I carefully got out my hand dyed blue fabric -- a couple of yards and cut what I thought was 10 inch squares.  Being very efficient, I had 8 layers.  Unfortunately, I cut them 9 inches by 10 inches instead of 10 x 10!!  I took some of the darker Hoffman batiks just to get my feet wet in making these blocks and this was my first iteration after I cut down those blue blocks to 9 in x 9 in and trimmed down the 10 in Hoffman blocks.  I had decided I didn't want to waste any of the nicer Hoffman blocks by cutting the down and wasting fabric so I grabbed some scraps I had.  This was how it looked at day 1.  Pretty boring and not something I was going to keep and also a little dull for baby quilts.

I didn't want to use any more of my good dyed blue fabric so scrunged up some miscellaneous pieces I had that had been cut into.  I also went through my "drop cloths" from my ice dyeing (those pieces I put underneath the fabric to be dyed so that they don't get marks on them from my grate) as well as a couple of pieces that were remnants from other projects.  This was how it looked at day 2!


I ended up making 60 blocks!! So it is 6 blocks x 10 blocks (or about 38 inches wide by 80 inches tall)! The blocks end up being narrower than they are tall because of all the seams.

In this picture, the top is finished but unironed.  I haven't yet decided whether I will add any borders.  I also haven't come to grips with how I will quilt it. Putting it together is pretty mindless with the only matching to be done where the edges meet.  I don't worry about the rectangles lining up perfectly as it isn't noticeable if they are off.  I try to keep the points intact as well!

This quilt will be donated to our Sweet Charity group at quilt club.


Thursday, January 27, 2022

Finally Finished the Last of the Baby Quilts!


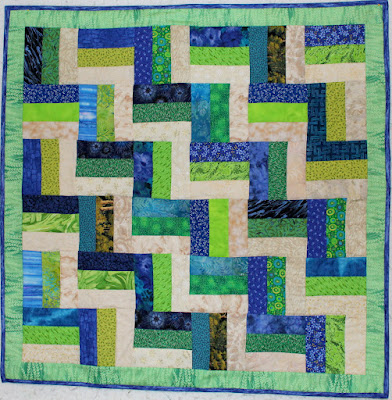
Well, I finally finished machine quilting and binding the remainder of the ten baby quilts and here they are!!  I have gotten really good at machine binding with my own little interpretation of how to join the pieces.  I have tried other more common methods but I always end up with them not laying nice and flat.  This is a common rail fence.


The next three are the ones I showed the pattern for in a previous blog.


This and the next two are my own variation.


Monday, January 24, 2022

Finally Some Birds to Report!!

Before we get to my birds, here are a few of the many baby quilts that I have completely finished.  I should have the rest done today or tomorrow as the machine quilting is done.  I just have to attach the borders and then the binding.  My new approach to both basting and borders has made the process sooooo much easier for me.  

Now I baste on my design wall by putting the quilt top face down, spray, batting and the the backing.  This way, when I am quilting, any wrinkles in the top can be smoothed out and I get NO wrinkles in the back!  

Also, I have discovered it is much much easier to attach borders after the quilt is all quilted.  I just leave enough batting and backing around the outside of the quilt.  So no more measuing and pinning to make sure it lays flat.  It lays perfectly now!

All of these quilts are 40 x 40 inches.


This was my favorite and of course right at the end as I was trimming the edges, I managed to cut off a triangular piece in the upper left hand corner.  I pieced it back together and it looks okay but sad as I really wanted this one perfect.


I still have more of these blocks -- like a lot more!  I will do something with them though as I hate all the white which demands to be quilted a lot!


Locally, someone posted that they had seen Cedar Waxwings at a local lake -- Greenfield Lake.  As they are one of my favorites and I haven't seen one in a few years, I headed down yesterday.  I was disappointed not to see any but did spot this female Kingfisher on a branch over the lake.  The females have the distinctive brown on their chests where the males are more boring!


The full frontal view.  I also saw a Pied-billed Grebe with a fish almost his size as well as quite a number of Great Egrets and Great Blue Herons.


On the way home, I decided to stop at Carolina Beach Lake and was surpised to see this beautiful Marbled Godwit.  I hadn't seen  one in fresh water before and it has been a couple of years since I have seen one at all!!  There were also lots of gulls and Kildeer.


As I was in the car and had my camera, I deided to venture down to Ft. Fisher even though it was not low tide and was a weekend (therefore more people).  There was nothing much down there, but on the way back I noticed a large flock of robins and blackbirds flying back and forth across the road i was on.  It was such a pretty backdrop for the birds, I took a bunch of pictures until I was holding up a car behind me (there was no shoulder on the road where I was).  Imagine my surprise when I got home and was blowing up the pictures to discover Cedar Waxwings!!  One woman counted five in this picture but I am only sure of four for certain!!


Here is one of them closer up!!  So I got to see my Cedar Waxwings after all!  They are such beautiful elegant birds and one of my favorites for sure.  It was a very chilly day and I certainly didn't expect to see such early migrators!


The next three are just my common friends that I see frequently at the pier -- a Great Blue Heron here.


A Great Egret but I liked the background for this one!


A juvenile Ibis who still has a little brown in his feathers!


Tuesday, January 11, 2022

Still More Baby Quilts in Process!

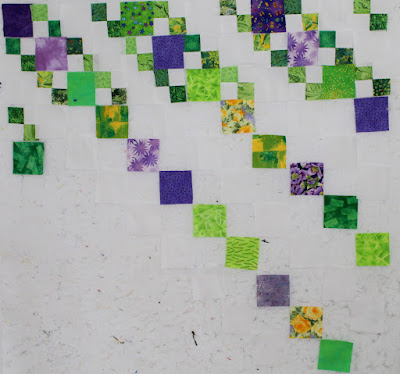
I keep discovering bags of leftovers from previous quilts.  The leftovers used in this top are from a mystery quilt I did a couple of years ago.  They are 3 1/2 inches square,  so the four patches were again made with 2 in strips.  I had a bunch of white strips left over and cut down a bunch of 2 1/2 in strips left over from the disappearing rail fences I did last month.  I have actually used up most of my pre-cut green 2 inch strips in.   I had initially decided to make it 13 x 13 or 39 inches square but finally decided on 12 x 12 to which I will add borders.


This is the top as of this evening.  When I went to bed last night, it was partially done and of course a four patch was turned around in the middle so the first order of business was to rip out seams....All of these quilts are easy but putting them together leaves lots of room for mistakes as I have proven over and over!


Again, some more leftover blocks.  I didn't have enough of the green to make half square triangles for all the squares but think I like this better!  This is 40 x 40 inches so won't need a border.


Still more leftover 2 1/2 inch strips.  This was my first option for setting.  For some reason, I have never cared for this arrangement so I tried again with a more traditional layout.


So this will be the arrangement with which I will go.   It will need a border as it is only 36 x 36 currently.  I still have enough strips left over to do something else...


Thursday, January 6, 2022

A How-to Post Hopefully!

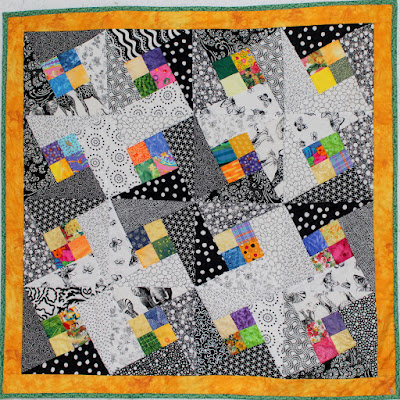
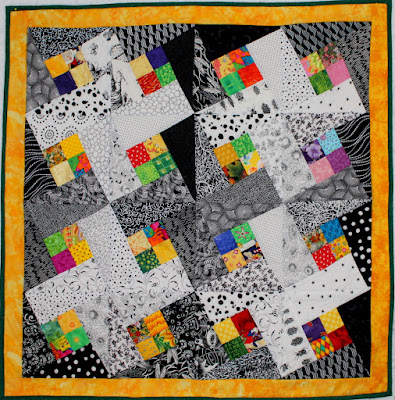
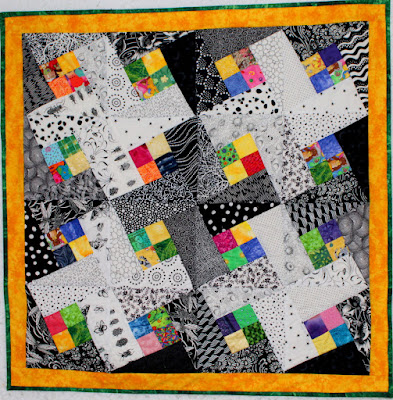
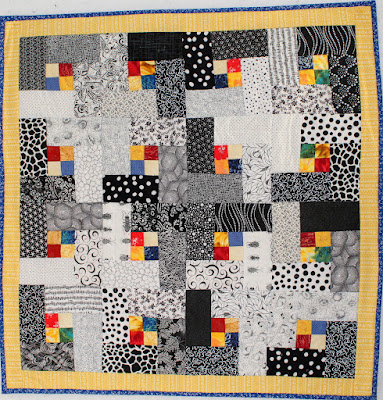
 I thought I would attempt to explain how to do a number of the recent baby quilts.  Several people on Scrap Quilt Enthusiast page on Facebook have asked for individual instructions for the different blocks and quilts.  The blocks are all fairly simple but arranging them properly is the difficult part.

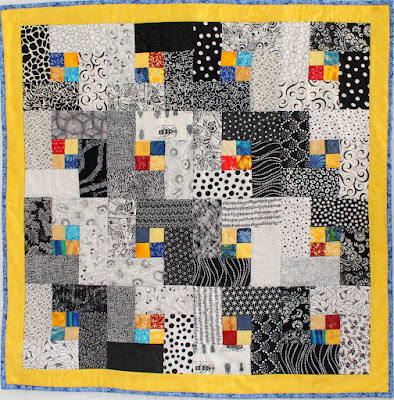
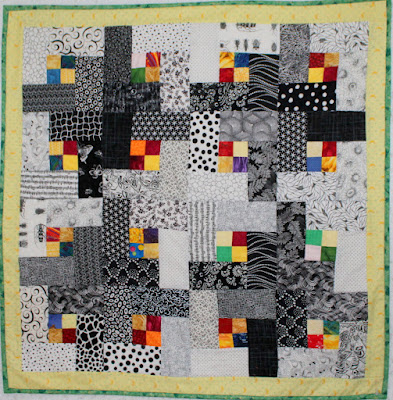
The block for this and the following two quilts is the same.  It is made up of a four-patch in the center which is made with 2 inch strips and finishes to 3 inches.  The rectangles are cut from a light and a dark and measure 3 1/2 inches by 6 1/2 inches.  There are a total of 16 blocks in each of the quilts.  Without borders, they measure 36 x 36 as each block finishes to 9 inches.

You sew them together by the "partial seam" method which means you sew the first seam only halfway down and then work around the block.  At the end, you finish up that seam.

The trick is in the layout.  For each of these quilts, It is a recurrence of the four blocks.  I still have to look at pictures to arrange them properly.


Again, think of this one as recurring pattern of four blocks.
This is like the first but with the dark and lights reversed.


These next two are really variations of the above.  Instead of using straight rectangles, rectangles are cut in half diagonally.  The trickier part of this pattern is that you are dealing with bias along all edges.  You sew them together the same way as the above with the partial seams.  They also contain four patches that finish to 3 inches.

The Electric Quilt pattern with the measurements is below.  16 blocks also measure 36 inches square when done.


Instead of making the rectangles alternate color, I do dark, dark, light, light. The only trick in the cutting is that you have to cut all the pieces from right side up fabric so don't cut from folded fabric or you will get triangles going in two different directions -- ask me how I know!!


This was a pattern given out at our guild so I don't know the source.  It is made up of two blocks that are simple to make.  However, it is very very tricky to get the in the right order.  Again, it is best to think of the in groups of four.

The colored blocks are 4 1/2 finished so 5 inches unfinished in bright colors.  The 36 inch quilt requires 36 of these 5 inch squares.  The sides are made from 2 inch strips.  You cut 7 2 inch strips by the  full width of the fabric from black and from white.  You make 1 strip of black/white/black and one of white/black/white.  You then cut these to 2 inch widths.  You need 18 of each of these.

You take the remaining strips and make two strips that are black/white/black/white and then cut them to give you 36 strips.

You then sew the shorter strips to all the blocks, so you have 18 that have black at the edge and 18 that have white at the edge.  You then attack the longer strips, turning half one way and half the other way so you get the checkerboard affect.  You will then have two piles of completed blocks with checkerboards on two sides.  

This may look easy but it is not!  you really need a design wall of some kind and even then...


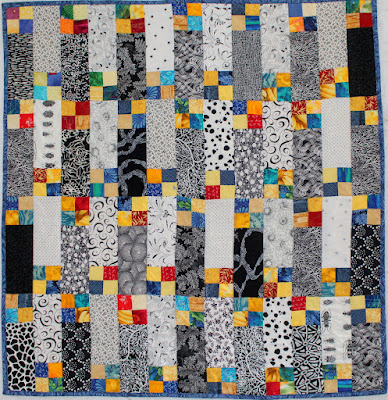
This is another super simple quilt.  It is made up of those same 3 inch finished four patches and rectangles that are 7 1/2 x 3 1/2 inches.  You need to make 52 of these blocks to make a quilt 39  inches x 40 inches.