Friday, August 4, 2023

Second "Quilt As You Go" (QAYG) Almost Done and How I Do them!


1.  Place the one inch strip of the sashing for the right side on top and a folded 1 5/8 in strip of the sashing for the back on the right hand edge of the first square, making sure the open edge of the back sashing is at the edge of the square.  Pin in 3 places.

2.  Sew through all the pieces 1/4 inch from the edge.

3. Take the second square and arrange the top sashing along the edge, again placing three pins and then sew in place a 1/4 in from the edge.  This leaves 1/2 in of sashing on the front all finished.  Now to finish the sashing on the back.

This is how it should look at this point with the second seam in the front sashing completed.


4.  Now open up the two squares and pin down the back sashing in three places and sew fairly close to the right edge making sure you have matching thread on the back and the front.

This is what the back looks like finished.
If you are really likely, you can get the sewing right in the ditch but here it is on the front sashing and sometimes it sits on the finished part of the block.  It really doesn't show too much if you use thread that is a neutral on the front.


Once you have all the rows completed, do the same steps to sew the rows together.  The only additional thing to be mindful of is that try your best to get the vertical sashing lined up, both front and back.  I am sometimes more successful at that than others but again, it is a little annoying but probably not too bad!


Here is the front except for the binding for QAYG2.  I used blue sashing for this one and will use the same fabric for the binding.


This is the back of QAYG2 and I used all different squares for this one but still didn't arrange them in any kind of order.


Sunday, July 30, 2023

"Quilt as You Go" Fun! Really, Really Scrappy!

Well, sitting there with bags of strips and leftover smaller squares, I decided to again attempt a "Quilt as you go" quilt.  I had found the last one I did to not be too much fun but thought I would try again.  I had a large bag filled with scraps of batting that were too narrow to even sew together for a larger quilt so took it all and cut it into 10 in squares.  I really utilized it as if I didn't have 10 inches, I pieced batting together to make it 10 x 10.  I chose 10 x 10 as that was the size of those random 10 in squares I had cut out as referenced in my last blog!  I had about a 6 inch high pile of them!  The strips were the leftovers from cutting those 5 and 10 in squares.  They include hand dyes as well as failed marbling fabrics where there was not enough to really do anything with.  They were all different size strips and the ends were chunks from another bag of small pieces. 

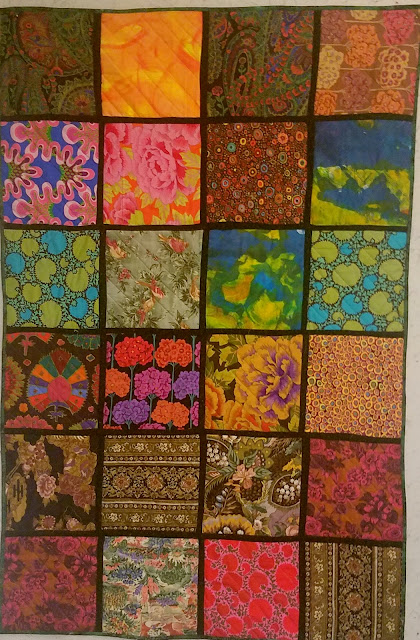
Here it is done and measures 40 x 60.  I had originally intended as a baby quilt but it didn't feel babyish enough for me.  Of course, it will be donated to one of the charity groups in which  I participate. 

And here is the back!  There was no way I could keep the front and back organized the way I wanted at the same time so there are a few blocks I would move around on the back if I had been able to figure out a way to do it!

I must say this second time went a lot more smoothly than the first and it is probably because I learned some things doing the first like making the back sashing strips 1 5/8 inches wide instead of the one inch wide in the front.  I also stitched that second block to the first with the sashing side on top which seems obvious but don't think I realized it before.  There were a few "gotchas" but went pretty smoothly.  I think the whole quilt only took a week of my afternoon 2 hour sewing sessions.

I discovered that I had a lot more scrappy 2 inch strips in bags on my sewing table which is pretty much a mess at this point!  So I decided to do another QAYG using just the 2 in strips.  

I also have designed another block which will use my 5 inch squares and will be QAYG but that will have to wait until I get this second quilt done.  

I spent a good deal of this afternoon piecing together batting to make 10 in squares.  Where I don't have enough, I cut 7 in squares which I use to make pot holders!  Only had a few of those.


Here is the beginning of that quilt.  To be continued...


Wednesday, July 19, 2023

Been Doing Lots and Lots of Cutting!!

Well, I finished this one block wonder and then decided it was time to "unstash" some of my fabrics that were in various and sundry places and not big enough to really do anything with.  I decided on 5 in squares and 10 in squares.  If the pattern was really pretty and largish, I would make 10 in squares and then cut 5 inch squares from the remainder.  Occasionally I had enough for some 2 1/2 or 2 inch strips.  I rarely threw out anything more than 3/4 in wide but filled a waste paper basket!


This is a 12 inch by about 18 inch plastic box which contains all the 5 in squares which are standing up so  you can easily see everything.  I noticed there really weren't any greens, blues or yellows to speak of.  I use a lot of these colors and must have most of them down south or in larger yardage.  This was mostly cut from fat quarters or quarter yard pieces.  Lots of hand dyes and a few marbled pieces that were not good enough to keep whole.


While going through the miscelaneous boxes, pulling out the small pieces, I came across several (what I thought) were really nice pieces of hand dyed fabrics from a long time ago.  I didn't want to cut into them as they were fat half quarters so decided to put them up on my design wall for inspiration.  Immediately I thought of jackets or large totes.  I really don't need another jacket, but one may find its way into one when I get back to the south where my favorite pattern is!


This was my favorite and most likely to be a jacket back in the future.


This will find its way into a tote I think.  So will the next one.  They are fat quarters.  


This is also one of my favorites and is tied with that other one for a jacket favorite!

Friday, July 7, 2023

It's Been a While!

Even though I haven't posted, I have been sewing.  This 4 patch posie was created from one of the fabrics from the previous two quilts.  I wasn't crazy about the fabric and I had enough to do this one.  I have been gathering fabrics to border each one of the blocks in a variety of colors.  I may need to take this one to the beach to finish as I have a larger selection of hand dyes down there.  I am relatively pleased but still trying to decide whether i will do one in a another colorway that I had.  I finally discovered the quilt in which I had used many of those brown Kaffe fabrics -- it was an art quilt I did many years ago and which is hanging on one of my walls!


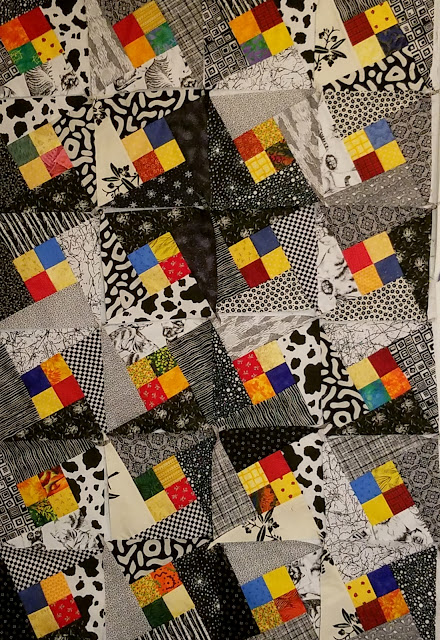
I then delved into some of the black and whites I had up here -- again not as great a collection as down south.  I had some of the half rectangles cut  out and a HUGE pile of four patches I made from some random scraps so went with this very old pattern.  The half rectangles are 9 3/8 in x 4 5/8 in.  They all have to be facing up when you cut them.  The four patches are made from 2 12 in squares.


I got bored so didn't cut any more rectangles but still have a ton of four patches!

After finishing the above tops, I went through boxes in my sewing room as well as the basement to see what patterned fabric I could find to cut up into 5 inch squares and 10 inch squares.  I started with the leftover Kaffe fabric.  Any fabric that read as a solid substitute, I cut into 2 1/2 in strips to be used as borders or binding.  I always do these in groups of six.  In doing this, I found this fabric which I didn't like well enough to cut into large pieces.  However, I did like the colors and I had enough for six repeats so I decided to do a stack and whack.  It was time to do a little sewing again!


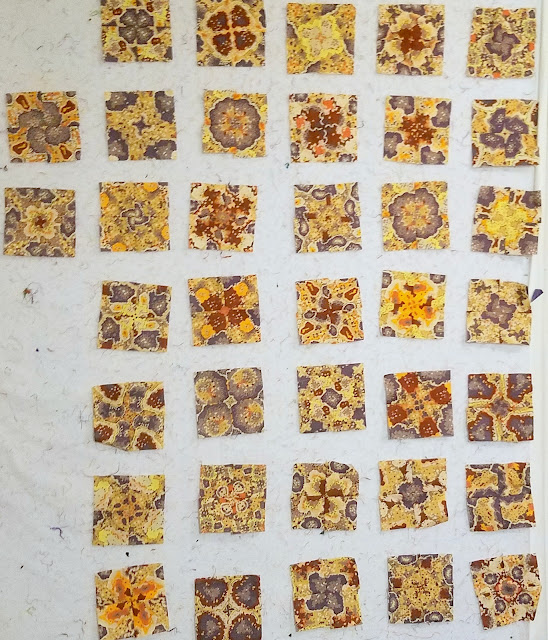
So I ended up with the makings of 55 hexagons and started putting them up on the wall.  I think there are 35 here and this isn't the final configuration as I want to move some around.  The hexies are still in two 3 triangle pieces.  I decided to do this one as a "one-block wonder" rather than inserting any triangles as I do like the colors and there is enough variation so you can group colorings in hopefully a pleasing manner!  I have enough of the fabric leftover for an outer border for sure.  There will be a white inner border as well as probably a thin green one.  I'm not sure whether I will give this one away or not as I do like the colors!

Not pictured but I have huge piles of 10 in squares and 5 inch squares and I have been collecting patterns on Pinterest to make use of these!


Saturday, June 17, 2023

Two Down and the Start of Another

The first one is finally done except for the borders which I will add after quilting.  I do like the way it turned out and think it was a good use of the fabrics.


This is the second one which I have since finished but neglected to take a picture.  It is a little shorter and has different ending triangles on the side.  

This is one of the fabrics I used in the above tops.  I had two different colorways of this fabric and this was my least favorite so I decided to see how it would look as a "posie" stack and whack.  It had a 12 inch repeat so each square was 2 3/4 in maximizing the repeat which after trimming was only 11 1/2 inches.  I ended up with 54 squares which will finish to 4 1/2 inches each.
Here are the first 37 completed.  They are pretty tame and I am not yet sure whether I want to cut up the other fabric  but probably will as thre is enough variety.  

My technique is to rip the fabric into its sections and then to sit in bed watching tv and pin along all four sides to insure I get perfect repeats.  

The next day I cut all the packets of squares and then sit in bed the next night auditioning the positioning as you can make so many with these 4 patches!  I put a pin in the corner which means that is where the center will be.  

I then carefully place them on piece of batting so that I can accurately pick up the pieces.  

I will most likely frame each of these squares with a variety of matching colors - greys, tans, browns and golds.  


Friday, June 9, 2023

A New Project


I have seen versions of this quilt on Pinterest and have wanted to construct one for a while.  It looks pretty easy but I didn't think it was!!  Maybe faster the next time.  Anyway, I found this pile of Kaffe Fassett fabrics all in browns which I had left behind up here in Rochester (I took all the brightly colored ones south and don't really work in browns anymore).  I cut up 4 1/2 inch squares and then made the half square triangles using the "8 at a time method" I documented before.  It uses 10 in squares of black and white.  Three ten inch squares gave me enough for the top.


I found a small piece of the beige fabric to use to finish off the sides.  I had a terrible time figuring out how many to do across and down and screwed up a number of times on my design wall (not sewing thankfully).  I started with a 7 across by 8 down set but ended up doing 6 across and 10 down so that the corners would be the same.  This also allows for borders without having to buy double fabric.  It will be a "comfort quilt" to be donated either here or NC.  I started sewing the top left corner just to see how it tooks and I am pleased.


I finally sewed all the rows and have them on my design wall awaiting my putting them all together.  My back decided to give me fits at the end of this day of sewing so I am resting a bit before completion.  I think I will attempt putting it together here in Rochester as I sewed a bunch of batting together the other day so should have a piece big enough.

I am pretty sure I will do more of this design as I really like it and it is a good use of all those bags of 5 in squares I have.  Trimming them to 4 1/2 inches is easy!

If I do baby quilts, I will make them 6 x 8 and use a softer color instead of the black.

Friday, June 2, 2023

Farmer's Wife 20s Blocks and Some Fun

Because I had more blocks for this quilt than the 30s blocks, I decided to go with a 11 x 9 orientation which with the sashing will yield a top that is 80 x 100 inches approximately.  I decided to add sashing as I felt the eye needed some place to rest and some dark to counteract all the light.  I haven't quite decided to do about borders yet but they won't be wide!  I actually used every square inch of the purple fabric that I had in the sashing.  I was two 9 in strips shy so found another piece that was close.  I had roughly calculated before I started using the fabric.  This is the first far left section.


This is the middle section.  Those outside strips are not attached but will be added when I do the "quilt as you go" combining the sections.


This is the third and last section.


In RAFA (Rochester Area Fiber Artists) group yesterday, Joyce showed us something called momigami (hope that's spelled right) which is the crumpling of paper over and over to give you a fabric-like look.  We took small pieces of brown paper bags and crumpled and re-crumpled and even added a little oil to our hands.  I took it one step further and took a photo of the result which is to the left.  I then played around just using Picasa  (not Photoshop which would yield even more interesting results).  I printed this on an 8 1/2 x 11 sheet of paper (thus enlarging it by about four).  I am thinking I will print it on some cloth as well as it looks like rocks to me and could be used in an art quilt.  Some of the fiddling around with Picasa is below!