Tuesday, April 20, 2010

The Heron Unfolded -- Almost Done!

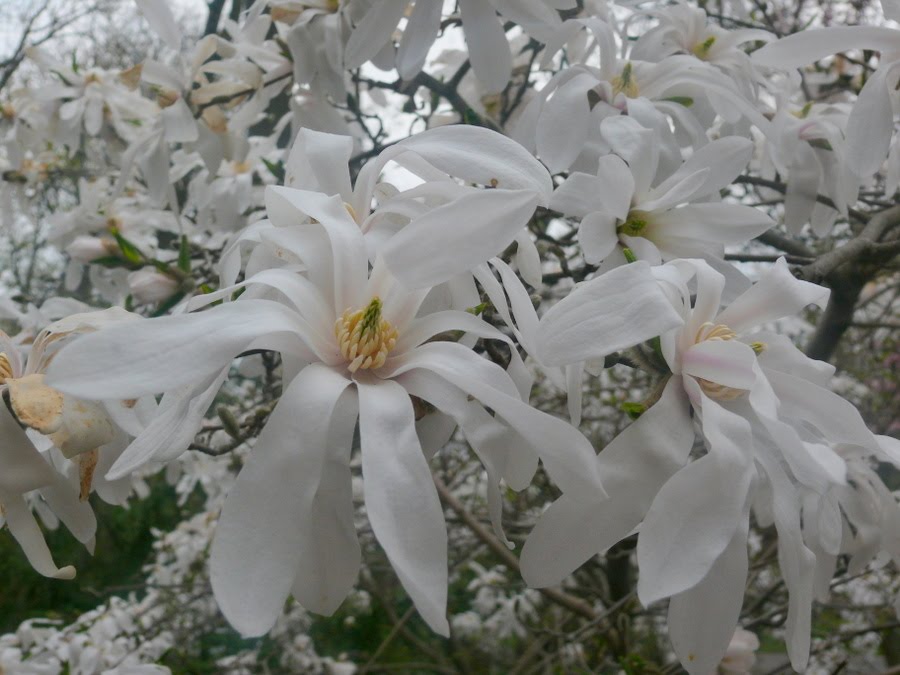
Our saucer magnolias are in full glorious bloom! I have never seen so many flowers on this tree!
The next few pictures are the evolution of the great blue heron on which I have been working diligently. When I get near the end of a project like this, I get a little manic!! Here I have just started to add the water around his feet.


I am auditioning the first of the sky pieces here. I had decided to piece the sky background using multiple sky blue and aqua fabrics just to give it a little more pep. I random cut curves into the edges as I do love curves and the rest of the piece is all straight lines!

Ah, this is the way the day started at Marcia's. I had finished the heron and his background. If you remember, I decided that he shouldn't sit in the middle but should be on the far right side, so I lopped off most of the pattern for sky on that side. However, it needed more on the left side and even before the Janet Fogg class, I had decided I would do pieced blocks but wanted it subtle. First I planned on doing Storm at Sea but decided that was too busy. Next came Snail's Trail which is also called Ocean Waves. At first I was going to make 8 inch blocks but that felt too big so I went with 6 inch blocks and made the Ocean Waves block -- just didn't work -- again too complex for the sky. Would you believe that I found a block called Great Blue Heron!!! So I tried that!


This is the heron with his new Great Blue Heron blocks almost completely assembled. I still have one to go which bridges the darker color of the water and the lighter color of the sky. This piece will look much better when it is quilted and the sky pieces lay flatter. I still have a couple of things to do on the heron to "improve" him and then we will be ready to quilt. I am feeling quite productive as this is my fifth quilt finished so far this year.


Vicki Welsh, I hope you are reading this blog! Priscilla brought this fabric from your Etsy shop and when I saw the name, I knew I recognized it as you have posted comments on my blog! It is a beautiful piece of fabric. We loved the piece on the right hand side as a companion. It is an African fabric Priscilla got years ago and it was a perfect match for the colors. This was one of several projects Priscilla was working on!


The next two pictures are of Priscilla's turquoise jacket which is just beautiful. The colors and the fabrics are just stunning! It is one of my favorites I think! Too bad it isn't my size! That is Priscilla looking up at it!


One of the deer that frequents Marcia's pasture hesitated and posed for me right before I left this afternoon! Since Marcia no longer has her horses, her pasture has become home to deer and one very happy groundhog who I pictured in a blog much, much earlier!!


The article about the Almighty Dollar Exhibit was published recently in The Numismatist which is the journal of the American Numismatic Association. Through internet connections (my blog), the editor (who coincidentally lives here in Rochester) heard of the exhibit and wanted to do a small article on it. Pat Pauly (the curator and organizer of the exhibit) quickly responded with text and pictures and it actually got published before the exhibit is over! How is that for a cross-interest exhibit! If you double click on the article, I am sure you can read it!

Thursday, April 15, 2010

Before the Rains Come -- Early Spring!

Our star magnolias are blooming and the saucer magnolias will follow soon and then the Japanese cherry trees which are just about ready to bloom. Imagine being only a couple of weeks behind DC -- it is usually at least a month!


Our lavender azaleas look really nice this year. For years we had no blooms.
Every year I look up the name of this flower and every year I forget it. These were particularly vigorous examples.


The nature goddess must know that I am leaving for NC in a couple of weeks and has provided me with a very early spring here in Upstate NY. It is supposed to rain for the next few days so I dashed out to take pictures of the trillium and other spring flowers before they got all muddy (and not so picture worthy!). Of course, I hadn't noticed that I had managed to smash my UV protective lens on my camera yesterday when I dropped it. It took me a bit of time and a heavy duty wrench from my husband's toolbox to get the lens off as I smashed it in somehow as well. Thankfully, it came off eventually and their was no damage to my camera or the main lens. I hurried to the local photo store to get a replacement lens (and of course look at all those lovely digital SLRs which are beckoning me.....).

So I went out again and took more pictures. My neighbor has managed to cultivate trillium (trillia?) by planting the seeds around the yard from the old plants. She has quite a few of the white and purple trillium now and they are at their height of beauty. The white will eventually turn pink before they die. It was really surprising to see them so soon and if Sharon hadn't pointed them out, I might have missed them as I never expected to see trillium in mid-April.

Wednesday, April 14, 2010

Going to India Vicariously!

Priscilla Kibbee just got back from one of her sensational trips overseas (her blog is noted on my sidebar) with many treasures as usual. Of course Marcia and I had to go over and see what she brought back this time. Part of the fun is having Priscilla pull out each pile and tell us about it so that we can purchase a token or two for our own stashes.


An even larger part of the fun is seeing the pieces that Priscilla is keeping for herself!! This incredible applique and embroidered piece is one of those that she is keeping (although she said originally she planned to sell it but loved it like we did). Wow is all I can say for some of the things she picked up this time. She explained that even though she was in India for two weeks, all her shopping basically took place during the last 36 hours in Delhi! She just had to fill those two suitcases. I greatly benefitted from this as she had brought back some wooden stamps (which I love) and which never would have made the cut as they are quite heavy.

This picture and the next one are very detailed painted silks -- just amazing. She had some smaller pieces that she will be selling.


This is one of two embroidered silk pieces that are just huge (36 inches x 80 inches) which she brought back. This is all hand embroidery with tiny stitches all over. I believe this is called Kantha embroidery and is done mostly by the people of West Bengal (I believe Priscilla got it in Delhi). They are finished like scarves (or really shawls they are so large). Probably double clicking will you a better idea of the detail in these. I bought one last year that was covered with all different kinds of animals and it remains one of my favorite pieces.

I saw this piece and fell in love! It is the second of the embroidered silk pieces and I am sure Priscilla was thinking of me and my birds when she purchased it knowing I wouldn't be able to resist! It is stunning to say the least and had to come home with me. There are easily 100,000 individual stitches in this -- probably twice to three times that. The workmanship is spectacular - the kind of fine work you saw in our American quilts from the early 1800s. And you just know that she has even better pieces in her collection!! Those areas that look appliqued are really embroidered even to the solid looking patterns on the sides. They are all just tiny running stitches. I am not sure if the embroidery is silk or cotton thread but it does feel like silk. Of course I also felt compelled to buy some of her luscious silk scarves and a few doodads for decoration on garments! I kept reasonably under control.

Monday, April 12, 2010

You Just Never Know - Journey of a Dyer!

An art quilt friend asked me to do some custom dyeing for her which I do occasionally (but very selectively). She wanted a very muted beige/brown background with subtle mottling -- she always gives me the photo she is working from as a guide. As I was trying to get up a group of this color myself for the lions, I gave it a first try.

For my dyeing, I almost always use Preferred for Dyeing (pfd) fabric but have found that for lighter colors and overall "solidity", sometimes a good non-pfd fabric will work well -- some of those that have some permanent press finish or some optical brighteners. The finish acts as a resist and you get some nice overall colors sometimes (especially those pesky lavenders that you want to have some blue in). So I decided that this would be a good fabric for doing my friend's request. It was a non-pfd white Robert Kaufman Kona that I got at Joanns. I keep a small stash of the white for my marbling and fabric painting as it performs well in those capacities.

So I went with a pretty low concentration (maybe 2% for bright yellow and golden yellow) on this fabric and then added in Pro Chem's Basic Brown (one of the few "mixed" colors I regularly use). I only added about 1/2 to 1% of this. I figured I would get nice and light. Wrong!! It acted just like a pfd fabric and sucked up all the color and I got a very deep gold color. You can see this in the first picture above!


I knew the above color would not do so took one of my snow dyes to her with which she was thrilled! So now I am left with 6 yards of deep gold, some of which I can use. I had a bunch of the basic brown left (although it has been aging down there in liquid form in the basement) so added a tsp of Deep Black to the solution this morning and poured it over 5 of those six yards. The result is not too bad! There was obviously no permanent press or optical brighteners in this batch! I got good mottling and a lot of very deep browns. These two pieces are the results -- one is two yards and the darker one is three yards.

I have another 10 yards of it all scoured and ready to go. I am thinking some reds and oranges overdyed with browns and blacks. I am doing things a little differently also. I have a couple of big flat boxes and I am scrunching the fabric and covering the bottom of the box. 5 or 6 yards fit easily into one of the boxes.

I am doing LWI the Ann Johnston way with just wetting the fabric (usually I use it dry) and then pouring the dye all over it and then messaging it in. I am of course pouring the dye very unevenly but doing a lot of message to get the subtle mottling but an overall variation in color. I let it sit for 15 minutes and then pour in the soda ash solution and message a little bit. I then weight down the fabric with another box with a bucket of water in it. I really like using baggies as it is easier to squeeze out the air and get overall coverage of the fabric but this is working pretty well! I let it sit for about 2 hours, rinse, wash and iron!

Won't these two fabrics above work really well for my lion's mane? I was planning on doing a lot of piecing but these almost stand alone with lots of stitching. Nah, will still piece!

Saturday, April 10, 2010

Class with Janet Fogg and a Closer Look at Some of Her Quilts!

Janet gave me permission to publish pictures of the quilts that have been out there for awhile. This one as well as the other full sized pictures were taken from the back of the room during the quilt club meeting. I think it gives you a good idea of the sheer size of these beautiful quilts.

This and the next picture are closeups of the kitty above. Double click so you can see the detail of the stitching in these.

Today, during class, I had the opportunity to see her machine quilting closeup. It is nothing short of spectacular.
She uses a long arm machine but does all her stitching freehand. She truly is doing very innovative work with a long arm. It is easy to see why these are prize winning quilts.

This is a Siberian husky that she pictured. Janet uses hand dyed fabrics that she buys from a local Portland Oregon dyer (her blog - http://janetfoggquilts.home.comcast.net/~janetfoggquilts/ can give you the name of the dyer). This woman custom dyes to Janet's specifications.

Janet's specialty is the combining of traditional patterns with pictorals. She machine pieces her pictorals for the most part although occasionally she will do some applique. Her technique is similar to Ruth McDowell's but she has made some enhancements and does some things a little differently. I definitely picked up a couple of hints especially with regard to curved piecing of these complex images.

I was amazed that in two days everyone in the class had their patterns drafted (and some were quite large) and were starting to pick fabrics. Janet was very helpful to everyone in all stages of the work.
I had done some initial drafting of my lions which will be my next piece but decided my time was better spent finishing up the heron. I made significant progress today. You may note that the heron has moved from the middle of the piece to the right hand side. I have decided to incorporate something in the background although I am not quite sure what it will be. I have thought of tesselated fish or the snail's trail block but done very subtly as I don't want the background to overwhelm the bird but it is just too boring the way it is now. I am actually further along than this photo suggests -- he has legs and a bottom now!


Ellen Erne was at the table next to mine and she was working on a very large kitty sitting under her sewing machine. She made a lot of progress and had a lot of her fabrics picked out and ready to go.

Carol was working on a tulip which was shaping up nicely. She had quite a bit of fabric placed by the end of today.

Thursday, April 8, 2010

GVQC - April Meeting

Spring is here! We are having a few minutes of sunshine between rain showers so decided Joe's daffodils next door needed blog exposure!


This is Marcia Eygabroat with a quilt she did for her new twin granddaughters. She is an award winning quilter who designs and makes these beautiful pictoral quilts. Her big claim to fame is that she used to live on the same street I have the beach house in Kure!
The next four pictures are from a distance and the best you can do with a little less light. They are the product of a round robin that was organized by some quilt club members. I couldn't believe how many people were involved as quilts and tops kept streaming across the stage! Today was the day they got back their quilts!


This was a completed piece started in the Velda Newman workshop from last month!


Janet Fogg was our speaker and will be doing the workshoop over the next couple of days. Her quilts are magnificent but she didn't want any pictures to be put on the internet so... She incorporates pictorals and traditional blocks together into her quilts.

This is the progress on the heron. None of the pieces are sewn together yet, just taped onto the master pattern in sections. Those two really light pieces in his chest are history. They were a nice stripey fabric but the value is all wrong so I have decided that all the fluffy chest feathers are going to be machine embroidered rather than attempting to piece them randomly although I may keep a couple that are hanging out on the left side and then machine quilt some more.

The blues and blue/greens are the fabrics I am auditioning for the background. This may be where I employ some of Janet's techniques (although mine will be a lot more subtle and will be background rather than a "leading" design element). I may chose, however, just to do a curved pieced background like I did in my Yellowstone pieces (long curved pieces of different fabrics horizontally). I will use whole pieces on the bottom of some of my hand painted/dyed fabrics.

Thursday, April 1, 2010

April RAFA Meeting

This is a collage of the various pieces that were made for an sale/exhibit at the contemporary art center here in Rochester. They are all for sale for $20 each and these are being donated for the sale. Each piece is 6" x 6" even though they look different sizes.

A beyond gorgeous spring day and a lovely meeting of our RAFA group! There were lots of things to share at Show and Tell and a great afternoon presentation by members Jeanne Beck and Deborah Pope on developing a portfolio and artists' statements. Both these women are very accomplished in the tough world of fiber arts - Jeanne as a multimedia surface designer/quilt artist and Deborah as an extraordinary doll artist. They both shared their personal experiences in developing these tools for those of us who want to take some next steps up in pursuing representation through galleries, increase our teaching or merely show a more professional presence when selling our art.

One thing that Jeanne said really stuck with me and that was that developing your Artist's Statement really helped you focus on what you were trying to accomplish as an artist. I really think that is true. This type of artist's statement is an overall view of what you are doing rather than those statements that are attached to a specific piece of work which most people hate to do!


This purse just wowed me for a couple of reasons -- one I loved the fabric but two, it has the cleverest idea for the zipper!!! It is actually a half each from two separating zippers so you have a two tone zipper. I think you will have to double click on the picture to see the two colors -- how cool is that!


This is one of the many pieces that Sarah Terry shared today. She has been working feverishly the past two weeks after the passing of her mother.


The above piece by Sarah and this piece by Caren Betlinski both incorporate the Shiva paints and techniques illustrated in the Quilting Arts magazine.


This was the apron that Donna did using these Shiva sticks with stamps behind the fabric. It is just wonderful!


Okay, one last snow dye for the season!! Anne still has some snow in her yard way south of here. She said the snow is pretty wet by now and she had a pile of pieces and this was my very favorite. She has been dyeing up a storm lately. I think she is officially over on that dark side!!