 Part of our day long monthly meetings is a short program to expose members to some process or technique with which they may not be familiar. These are not intended to be full blown classes but are usually longer than just a demo. Different members of the group are called upon to share a sample of what they may be teaching professionally or just something they like to do. This ranges through all types of surface design as well as felting or working with beads or even finger weaving.
The above is purple brushed on new heavy weight plastic on the left and purple smeared onto a sheet of the play foam for kids as well as some stamping with painted blocks.
Today I volunteered to do something related to dye painting and chose something relatively simple which was monoprinting. In various classes I have been in, we have done an assortment of techniques and I tried to share as much as time would allow.


Here someone painted colors onto the foam and then ran the toy truck all over the surface and then printed the fabric!!
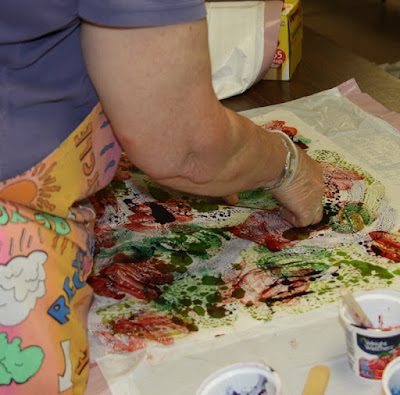
 Joyce decided to do some direct dyeing by painting directly onto the fabric. Joyce had done monoprinting before but not with fabric and really enjoyed it.

Julie brought in a tshirt that had been ruined by some stains. She splashed some thickened dyes onto a piece of plastic and then pressed the tshirt onto it to give this Jackson Pollack like result. She was thrilled as the stains no longer showed and the tshirt was retrieved!
Today I volunteered to do something related to dye painting and chose something relatively simple which was monoprinting. In various classes I have been in, we have done an assortment of techniques and I tried to share as much as time would allow.

Here, someone dropped some colors onto the foam or plastic, put the fabric on top of and then brayered the fabric causing the dye to spread out. I love the effects you get doing this.
I asked everyone to bring pfd fabric that was prepared by soaking in soda ash water (1/2 cup soda ash to 1 gal of water) and then drying on a line. I suggested fat quarters. I also asked they bring small cups for their dyes and foam brushes and white trash bags for transport and for their workspace. A brayer or roller foam brush was optional. I also sold some prepared fabric for those who were new to dyeing (we had two in the class that had never used MX dyes before) and several that were pretty expert.
I provided 2 ft x 2 ft masonite boards (I get the 4 x 8 ones cut down at Lowes and they are cheap). I also provided some heavy plastic pieces (about fat quarter's worth) and pieces of skinny foam (the kinds kids use and which I get in 3 ft x 5 ft pieces at Joanns). In addition, I had one large sheet of acrylic as well as several small pieces of that and foam. I also made up liquid dyes (sun yellow, fuchsia and intense blue) and print paste (1 cup powder to 3 cups water). I had some miscellaneous sticks and whisks for stirring. I used squeeze bottles for the dyes as that was the most effective for mixing it with the print paste with 10 people. I used up almost all the print paste I brought (6 cups) but had lots of dye left over (I made a quart of 10% solution for the three colors).
The techniques included:
1. slathering with brushes or sprinkling dyes on either plastic, masonite, foam or acrylic until you got colors and a pattern you liked. Then place the fabric on the surface and use a brayer to insure nice even coverage. As the surfaces are used more and more, there is less puddling of the dyes. Of course you can do the same piece over and over again too.
2. slathering dyes on a small piece of foam and then using some sort of pointed object to put lines on the foam and then using it as you would a rubber stamp on the fabric. I also had various different kinds of tile group spreaders with different patterns to use.
Unfortunately, it was a very humid day so the print paste was not as thick as I would have liked. I would do it thicker the next time. People in the class were incredibly creative including one person who brought a toy truck in and use it to march across the surface.

Here someone painted colors onto the foam and then ran the toy truck all over the surface and then printed the fabric!!
 Joyce decided to do some direct dyeing by painting directly onto the fabric. Joyce had done monoprinting before but not with fabric and really enjoyed it.


1 comment:
Looks like it was great fun, Beth! Sorry I couldn't attend. I would have loved the experience. My marathon is tomorrow so I am out west.
Judy
Post a Comment